How to Build a Kitchen Appliance Organizer?
Imagine opening your kitchen cabinets and finding everything in its place, each appliance neatly organized and easily accessible. No more digging through cluttered shelves to find your blender or mixer.
Sounds like a dream, right? With a little creativity and effort, you can turn this dream into reality. Building a kitchen appliance organizer is not just about tidying up; it's about transforming your cooking space into an efficient, stress-free zone.
This guide will walk you through simple steps to create your own organizer, helping you save time and energy in your daily routine. Are you ready to revolutionize your kitchen and reclaim your peace of mind? Let's dive in and discover how a well-organized space can change your life for the better.
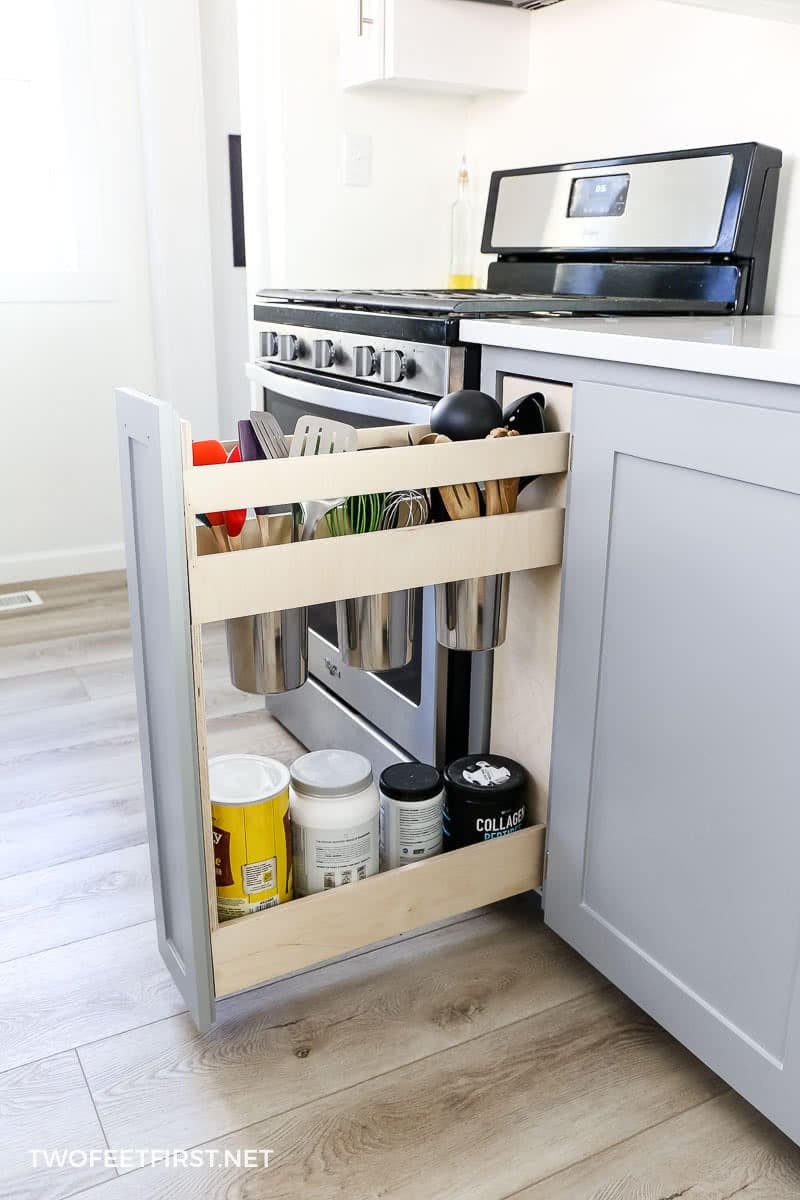
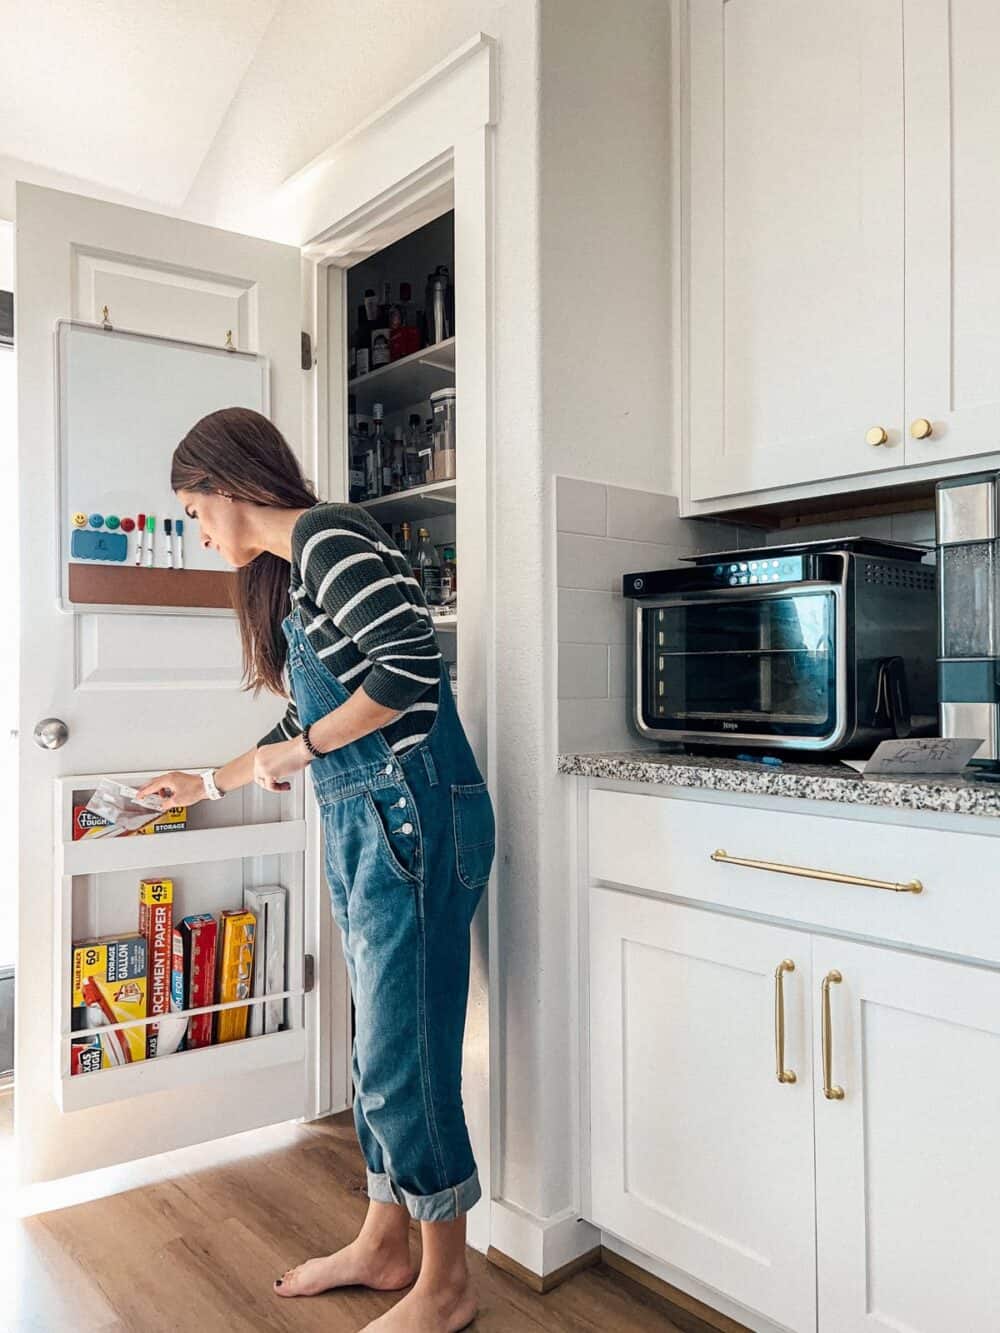
Credit: www.twofeetfirst.net
Benefits Of An Appliance Organizer
Creating an appliance organizer boosts kitchen efficiency and saves space. Arrange gadgets neatly to find them quickly. Keep counters clutter-free for a tidy, stress-free cooking environment.
An appliance organizer in your kitchen can be a game changer. Whether you live in a sprawling house or a cozy apartment, an organized kitchen is more efficient and enjoyable to work in. By keeping your gadgets and utensils in order, you can save time, reduce stress, and even inspire your culinary creativity. Here are some benefits of having a kitchen appliance organizer:
1. Maximizes Space
An appliance organizer helps you make the most of your available space. By neatly arranging your appliances, you free up counter space for other tasks. Imagine having a clear counter to prep your favorite meal without constantly moving gadgets around.
2. Enhances Accessibility
With an organizer, every appliance has its place, making it easy to find and use. No more rummaging through cluttered cabinets or drawers. You can enjoy the convenience of having everything at your fingertips, especially during busy mornings or when hosting a dinner party.
3. Improves Kitchen Aesthetics
A well-organized kitchen not only functions better but also looks more appealing. Your kitchen can transform from a chaotic space into a sleek and tidy area. A visually pleasing kitchen might even motivate you to cook more often.
4. Boosts Efficiency
When your appliances are organized, you work more efficiently. You can quickly grab your blender for a smoothie or your mixer for baking. This streamlined approach can significantly cut down the time spent in the kitchen, allowing you to enjoy more leisure time.
5. Encourages Better Maintenance
Keeping your appliances organized means they are less likely to get damaged. Proper storage can extend the lifespan of your gadgets. Have you ever found a forgotten appliance at the back of a cabinet, dusty and unused? An organizer can prevent such scenarios.
6. Reduces Stress
A cluttered kitchen can lead to unnecessary stress. An appliance organizer helps you maintain a clean and orderly space. This can make cooking a more relaxing and enjoyable experience.
7. Inspires Creativity
A neat kitchen can spark new ideas and creativity in your cooking. With everything in its place, you might find yourself experimenting with new recipes. When was the last time you tried something new just because you felt inspired by your surroundings? Consider integrating a kitchen appliance organizer into your home. What changes might you experience?
Credit: www.loveandrenovations.com
Choosing The Right Space
Choosing the right space for your kitchen appliance organizer is a crucial step that can make or break its functionality. It's not just about finding a spot; it's about finding the perfect spot that complements your daily routine. Imagine waking up in the morning and effortlessly grabbing your blender for a quick smoothie. Wouldn't that be a great start to your day?
Evaluate Your Current Kitchen Layout
Start by taking a good look at your kitchen layout. Where do you naturally gravitate when cooking or preparing meals? Identify the areas you frequent the most. This is where your organizer should ideally be located.
Consider the flow of your kitchen. Is there a space that seems underutilized or cluttered? Utilize this area to create a seamless transition between tasks. This will save you time and make cooking more enjoyable.
Consider Accessibility
Think about accessibility. Can you easily reach the appliances you use every day? Avoid places that require stretching or bending awkwardly. You want everything within arm's reach for convenience.
Do you have kids at home? Ensure that sharp or heavy appliances are out of their reach. Safety should be a priority when choosing your organizer’s location.
Measure Your Space
Once you've pinpointed potential spots, take accurate measurements. Knowing the dimensions will help you choose or build an organizer that fits perfectly. This prevents any surprises later when your organizer doesn't fit as planned.
Jot down these measurements and take them with you when shopping for organizers. This ensures you pick the right size and avoid last-minute adjustments.
Think About Your Routine
Reflect on your daily kitchen routine. What appliances do you use most often? Place those in the most accessible area of your organizer. It’s frustrating to dig through lesser-used gadgets to find what you need.
Consider grouping appliances by function. For example, place all baking tools together. This will make it easier to find what you need when you're in a hurry.
Visualize The Final Setup
Before you finalize the spot, visualize the setup. Picture how your kitchen will look with the organizer in place. Does it enhance the space or clutter it up? This mental exercise can help you avoid common pitfalls.
Ask yourself: Will this location help you streamline your cooking process? If the answer is yes, you’re on the right track. Your kitchen should be a place of efficiency, not chaos.
Choosing the right space isn’t just a practical decision; it’s about enhancing your kitchen experience. With the right spot, your appliance organizer can transform your kitchen into a haven of order and simplicity.
Gathering Necessary Materials
Start by gathering essential materials like wood, nails, and screws. Include tools such as a saw and drill. Ensure you have measuring tape and a level for accuracy.
Organizing your kitchen appliances can transform your cooking space into a haven of efficiency. But before you dive into building your kitchen appliance organizer, gathering the right materials is crucial. Having everything at hand will save you time and help keep your project smooth sailing. Let's break it down step-by-step.
Essential Tools
Start with a checklist of tools. A measuring tape is your best friend here. It ensures every shelf and compartment is perfectly sized for your appliances. Grab a screwdriver set. You'll need it to assemble parts and adjust screws as needed. A power drill makes the job quicker, especially if you're attaching heavy-duty racks or shelves. If you don't have one, consider borrowing from a neighbor or renting one from a local hardware store.
Materials Needed
Think about what materials suit your kitchen's style and your budget. Plywood is cost-effective and easy to work with. It can be painted or stained to match your kitchen decor. Consider using metal racks for a modern look. They’re sturdy and perfect for holding heavier appliances like mixers or blenders. Don't forget the small stuff like screws and brackets. These ensure your organizer stays sturdy and reliable. Have you ever started a DIY project only to realize you missed a critical component? It's frustrating. Double-check your list, and your project will thank you later. Are there any materials you already have that you can repurpose? An old bookshelf or unused cabinet can make a perfect organizer, saving you money and time. In the end, gathering materials thoughtfully can make the difference between a cluttered kitchen and a streamlined cooking space. What unique materials will you use for your organizer?
Designing Your Organizer
Crafting an efficient kitchen appliance organizer enhances functionality. Start by assessing appliance sizes and storage needs. Use adjustable shelves and clear containers for easy access. Labeling spaces helps maintain order and ensures quick retrieval of gadgets.
Designing your kitchen appliance organizer is a crucial step in achieving the perfect blend of functionality and style. This process involves more than just setting up shelves; it requires thoughtful planning and creativity. A well-designed organizer not only keeps your appliances in order but also enhances the overall aesthetics of your kitchen. The key is to make it work for your unique space and needs.
Assessing Appliance Sizes
Before you start, take a good look at the appliances you use most frequently. Measure their height, width, and depth. Knowing the exact dimensions helps in crafting an organizer that fits like a glove. You don't want to find out halfway through that your beloved blender can't squeeze into its designated spot. Think about which appliances you use daily, weekly, or occasionally. This will guide you in prioritizing space allocation.
Planning The Layout
Once you have the measurements, sketch out a layout. Use graph paper or digital tools to visualize how everything will fit. Consider the flow of your kitchen. Will the organizer be near your cooking area, or is it better suited near your dining space? Decide on the style of your organizer. Open shelving offers easy access but might require frequent dusting. Enclosed cabinets keep things tidy but might limit visibility. Personal experience can come in handy here. I remember the time I underestimated my toaster oven's size and had to rearrange everything. A little planning can save you from such headaches. Are there any specific appliances that need to be kept at arm's reach? Think about their usage and accessibility. Don't forget about future purchases. Leave some room for potential new gadgets that might find their way into your kitchen. This foresight prevents overcrowding and keeps your organizer flexible. Designing your organizer involves a bit of foresight, creativity, and practical thinking. By assessing appliance sizes and planning the layout, you ensure a seamless fit that enhances both your kitchen's utility and style. So, what will your perfect organizer look like?
Building The Frame
Crafting a kitchen appliance organizer begins with a solid frame. Ensure stability by selecting strong materials like wood or metal. Assemble the pieces carefully to create a sturdy base that supports your appliances efficiently.
Building the frame of a kitchen appliance organizer is the first step. This task requires precision and attention to detail. A sturdy frame ensures your organizer will last. You need to cut and assemble wood pieces carefully. Let's dive into the details.
Cutting The Wood
Select quality wood for durability. Measure each piece accurately. Use a tape measure for precision. Mark the wood with a pencil. A clear mark helps you cut straight. Choose a saw that suits your comfort level. A hand saw or power saw both work. Ensure your cuts are smooth and clean. Sand the edges to avoid splinters. This step prepares the wood for assembly.
Assembling The Structure
Lay out the wood pieces on a flat surface. Arrange them in the desired shape. Use clamps to hold pieces in place. Apply wood glue to the joints. Press the pieces together firmly. Allow the glue to dry completely. For added strength, use screws. Drill pilot holes to prevent splitting. Tighten the screws securely. Check the frame for stability. Make adjustments if necessary. A solid frame supports all your kitchen appliances.
Creating Shelves And Dividers
Build a kitchen appliance organizer by creating shelves and dividers. Store appliances neatly and access them easily. Maximize space while keeping your kitchen tidy.
Creating shelves and dividers transforms your kitchen space. They provide order, making it easier to find your appliances. You can maximize your space with a few simple steps. Let's explore how to effectively create shelves and dividers.
Measuring For Shelves
Proper measurements ensure your shelves fit perfectly. Use a tape measure for accuracy. Measure the width, depth, and height of your space. Write down each measurement clearly. Allow for a little extra space for easy access. Consider the size of your appliances. This helps in determining shelf height. Remember, accuracy is key in this step. Double-check your measurements. It's always better to measure twice. Cut once. This saves time and avoids mistakes.
Installing Dividers
Dividers keep your appliances organized. Choose dividers that fit your shelf size. Adjustable dividers offer flexibility. They allow you to change your setup easily. Use a screwdriver to install them securely. Ensure dividers are stable and not wobbly. Place them where they best serve your needs. Consider the size of your appliances here too. Large appliances may need more space. For small items, closer dividers work well. This way, everything has its own space. Your kitchen stays neat and tidy.
Adding Finishing Touches
Completing your kitchen appliance organizer requires attention to detail. Adding finishing touches enhances its appearance and functionality. These final steps ensure your organizer looks polished. They also make it more user-friendly.
Sanding And Painting
Smooth surfaces elevate the appeal of your organizer. Start by sanding the wood. Use fine-grit sandpaper for a sleek finish. Ensure every part feels even. This step prepares the wood for painting. Choose a paint that matches your kitchen decor. Apply a primer first for better coverage. Then, use a brush or roller for the top coat. Allow each layer to dry completely. This prevents smudging and ensures a clean finish.
Installing Handles
Handles add practicality to your organizer. They make it easy to access stored items. Choose handles that suit your kitchen style. Measure and mark where the handles will go. Drill pilot holes to avoid wood splitting. Attach the handles using screws. Ensure they are secure and aligned. Test each handle for smooth operation. This step completes your organizer’s transformation. Now, it's ready to use and admire.

Credit: www.amazon.com
Organizing Appliances Efficiently
Creating a kitchen appliance organizer can change how you use your space. An organized kitchen saves time and reduces stress. You can easily find items and enjoy cooking more.
Think about your kitchen layout. Group similar items together. This makes your kitchen neat and easy to use. Start by arranging items based on their size and weight.
Positioning Heavy Appliances
Place heavy appliances on lower shelves. This prevents accidents and makes them easy to access. Heavy items like mixers and food processors need stable surfaces. Ensure the shelf can hold the weight.
Consider the frequency of use. Keep frequently used heavy appliances at the front. If an item is heavy and rarely used, store it further back.
Arranging Smaller Items
Use upper shelves for smaller appliances. Items like blenders and toasters fit well here. Keep them within reach but not on the countertop. This keeps your counters free for cooking.
Use bins or baskets to group small items. This keeps them organized and easy to find. Label each basket for quick identification.
Smaller items like coffee makers should be near outlets. This reduces cord clutter and makes them easier to use.
Maintenance Tips
Maintaining your kitchen appliance organizer ensures it stays functional and appealing. Regular care enhances its lifespan and keeps your kitchen tidy. Below are some simple maintenance tips to follow.
Keep It Clean
Regularly wipe the surfaces with a damp cloth. Remove dust and spills immediately. Use mild soap for tough stains, then rinse and dry thoroughly.
Inspect And Tighten
Check screws and joints monthly. Tighten any loose parts to prevent damage. This keeps the organizer stable and safe.
Avoid Overloading
Distribute weight evenly to avoid strain. Too much weight can damage shelves. Keep heavy items at the bottom for stability.
Protect From Moisture
Keep the organizer away from water sources. Moisture can cause wood to warp or metal to rust. Use coasters and mats to prevent water damage.
Adjust For Wear
Look for signs of wear and tear. Sand rough edges and apply a finish to wooden parts. This maintains appearance and durability.
Keep It Organized
Regularly rearrange items for better access. This prevents clutter and makes cleaning easier. Keep frequently used items within reach.
Frequently Asked Questions
What Materials Are Best For Building An Organizer?
Wood, metal, and plastic are ideal for a kitchen appliance organizer. Wood offers a natural look, metal provides durability, and plastic is lightweight and easy to clean. Choose materials based on your kitchen’s style and functionality needs.
How Do I Determine The Size Needed?
Assess your kitchen space and appliances before starting. Measure the area where the organizer will go. Consider the size and number of appliances to ensure everything fits comfortably. A well-planned size enhances both functionality and aesthetics.
Can I Customize The Organizer Design?
Yes, you can customize the design to suit your needs. Include adjustable shelves or dividers for flexibility. Personalize it with colors or finishes that match your kitchen decor. Customization ensures the organizer meets your specific storage requirements.
What Tools Are Required For Construction?
Basic tools include a saw, drill, screwdriver, and measuring tape. Depending on the material, you might need additional tools. Having the right tools ensures a smooth construction process. Always prioritize safety by using protective gear during construction.
Conclusion
Creating a kitchen appliance organizer is simple and rewarding. Your kitchen feels tidy and efficient. Enjoy cooking without clutter around. Start small and build as needed. Use materials you like and fit your space. Get creative with design. Organization leads to a relaxed, enjoyable kitchen experience.
Make adjustments as your needs change. Keep your setup easy to access. Encourage family to maintain order. Share your organizing ideas with friends. A well-organized kitchen saves time. It brings peace and joy to your home. You'll love the ease of finding everything.
Now, your kitchen is ready for all culinary adventures.