Are you looking to transform your kitchen into a stylish and modern space? Adding a strip wood design to your kitchen cabinets can be a game-changer.
This simple yet effective upgrade not only enhances the aesthetic appeal of your kitchen but also adds a touch of warmth and character. Imagine walking into a kitchen that feels inviting and uniquely yours every day. You deserve a space that reflects your personal taste and style.
In this guide, you’ll discover easy steps to create stunning strip wood designs on your cabinets. Whether you’re a DIY enthusiast or a beginner, you’ll find the process straightforward and rewarding. Ready to dive in and give your kitchen the makeover it deserves? Let’s get started!
Choosing The Right Wood
Choosing the right wood for your kitchen cabinet strip design is a crucial step that can significantly impact the overall look and feel of your kitchen. Wood brings warmth and character, making it a perfect choice for those aiming to create a cozy yet stylish environment. But with so many options available, how do you decide which wood is best for your strip design?
Types Of Wood For Strip Design
Different types of wood offer unique aesthetics and qualities. Oak, for example, is popular for its durability and traditional grain patterns. Maple has a smooth texture and offers a lighter tone, ideal for brightening up spaces. Cherry wood, with its rich color, adds a luxurious touch to any kitchen. Each type brings its own charm, but which one matches your vision?
Beyond appearance, consider the wood's resilience. Bamboo, while not technically wood, is a sustainable option known for its strength and resistance to moisture—perfect for kitchen use. On the other hand, walnut provides a dark, elegant finish, but might require more maintenance to keep its luster.
Factors To Consider
When choosing the wood for your strip design, think about the existing elements in your kitchen. Will the wood complement or contrast with your countertops? Consider the lighting; darker woods might make a space feel smaller, while lighter woods can open it up.
Budget is another important factor. Exotic woods can be pricier but offer unique patterns and colors. However, locally sourced woods might be more affordable and still provide the aesthetic appeal you desire. It's essential to weigh the cost against the visual and practical benefits.
Don't forget maintenance. Some woods require regular sealing or polishing to maintain their beauty. Are you ready to commit to the upkeep needed for more delicate woods, or would you prefer something low-maintenance?
Ultimately, the choice of wood should reflect your style and practical needs. Picture yourself enjoying a cup of coffee in your newly designed kitchen—what wood would make that moment perfect for you?
Preparing Your Cabinets
Enhancing your kitchen cabinets with a strip wood design is a creative way to add style. Proper preparation ensures the design looks professional and lasts long. Here's how to prepare your cabinets for this transformation.
Cleaning And Sanding
Start by cleaning the cabinet surfaces thoroughly. Use a mild detergent and warm water to remove grease and dirt. This ensures the wood strip adheres well. Allow the cabinets to dry completely before moving on.
Next, sand the cabinet surfaces using fine-grit sandpaper. This smooths out any bumps and prepares the surface for the wood strips. Sanding also helps the adhesive stick better. Wipe away dust with a damp cloth after sanding.
Measuring And Marking
Accurate measurements are key to a successful project. Use a measuring tape to find the height and width of each cabinet. Write down your measurements to avoid mistakes later.
Once measured, mark where each wood strip will go. Use a pencil for easy adjustments. This step ensures your design is even and balanced.
Design Planning
Transform kitchen cabinets with a stylish strip wood design. Start by selecting suitable wood strips. Then, align and attach them to cabinet doors using strong adhesive. This enhances the kitchen's visual appeal and adds a touch of natural texture.
Design planning is the cornerstone of transforming your kitchen cabinets with a strip wood design. This process involves envisioning the final look and ensuring every detail aligns with your style preferences. Whether you're aiming for a rustic charm or a modern twist, planning your design ensures you achieve the desired aesthetic without any hiccups.
Creating A Visual Plan
Start by sketching out your ideas. A simple drawing can help you visualize the layout and flow of the wood strips on your cabinets. Consider using graph paper for precision, especially if you're dealing with intricate patterns. Apps like SketchUp can also be useful if you prefer digital tools. This step is crucial in identifying potential challenges and tweaking your design to perfection.
Balancing Colors And Patterns
Choosing the right colors and patterns is vital. Mix and match different wood types and finishes to create a harmonious look. Think about the overall color scheme of your kitchen. You want your cabinets to complement existing elements, not clash with them. Remember, contrast is your friend. Light wood strips against darker cabinets can create a stunning effect. Have you thought about how these changes will affect your kitchen's vibe? Consider how different wood grains and hues will interact with natural and artificial light in your space. Engage with this creative process and don't be afraid to experiment. Your kitchen should reflect your personality and taste, and sometimes the boldest choices yield the most rewarding results.
Cutting The Strips
Enhancing kitchen cabinets with strip wood designs involves precise cutting techniques. Begin by measuring the cabinet dimensions carefully. Use a saw to cut strips to fit snugly, ensuring a seamless and stylish finish. Proper alignment and attachment create a modern look.
Cutting strips for your kitchen cabinet design is crucial. The right cut ensures a sleek and professional look. Proper tools and techniques make the process efficient and safe. Follow these steps to achieve precise cuts for your wood strips.
Tools Required
First, gather the necessary tools. A table saw is essential for accurate cuts. A miter saw helps with angled cuts. You will need a measuring tape for accuracy. A pencil for marking is also necessary. Safety goggles protect your eyes. Gloves keep your hands safe. Lastly, a dust mask prevents inhalation of sawdust.
Precision Cutting Techniques
Start by measuring the wood carefully. Use a measuring tape to ensure accuracy. Mark the wood with a pencil for guidance. Set the table saw to the correct width. Align the wood strip with the saw blade. Keep a steady hand while cutting. Use the miter saw for angled edges. Adjust the angle as needed for precise cuts. Check each strip for uniformity. Trim any uneven edges for a clean finish.
Attaching The Strips
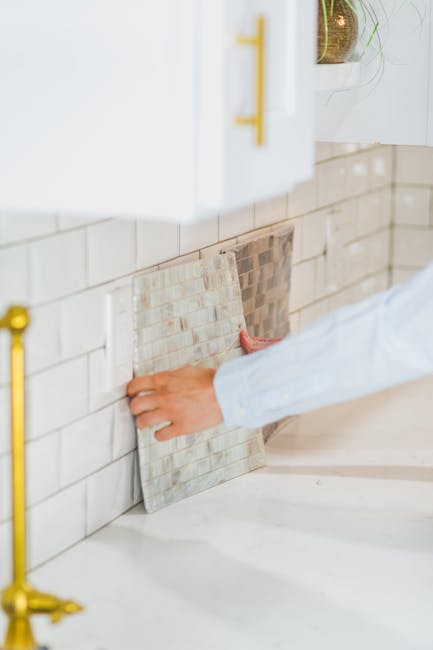
Attaching strips to kitchen cabinets transforms them with a sleek wood design. Secure strips evenly using adhesive for a smooth finish. Ensure proper alignment to create a stylish and cohesive look.
Attaching the strips to your kitchen cabinets can transform their look. This process requires precision and the right materials. Choosing the best adhesive and ensuring proper alignment are crucial. This guide will help you with these steps.
Adhesive Options
Selecting the right adhesive is vital for durable results. Wood glue is a popular choice for this task. It's strong and easy to work with. Make sure it's suitable for your cabinet material. Another option is double-sided tape. It's less permanent but works well for trial applications. Consider using construction adhesive for heavier strips. It offers a strong bond that lasts. Always test the adhesive on a small area first.
Ensuring Proper Alignment
Correct alignment ensures a professional finish. Start by measuring the area where the strip will go. Use a pencil to mark the placement lightly. This will help guide your alignment. A level tool is essential for horizontal strips. It keeps them straight and neat. For vertical strips, a plumb line works best. Secure the strip temporarily before finalizing the attachment. This allows you to adjust if necessary. Double-check the alignment from different angles. This ensures consistency and accuracy.
Finishing Touches
Adding strip wood design to kitchen cabinets enhances their appeal. Choose lightweight wood strips for easy application. Secure strips with adhesive or nails, ensuring even spacing for a neat finish.
Finishing Touches After installing the strip wood design on your kitchen cabinets, the finishing touches are what bring everything together. These steps ensure your cabinets look polished and professional. Paying attention to details now will save you headaches later and make your kitchen a place you truly love.
Sanding And Smoothing
Sanding your cabinets is a crucial step to achieve a smooth surface. Use a fine-grit sandpaper to remove any rough edges or splinters from the wood strips. This not only enhances the look but also prepares the surface for varnish or paint. Remember the time you rushed through sanding and ended up with uneven paint? Don't make that mistake. Spend a little extra time sanding, and your cabinets will thank you.
Applying Varnish Or Paint
Decide if you want a natural wood look or a pop of color. Varnish will highlight the wood grain, giving a warm, organic feel. Paint can transform the space with bold or subtle shades. Before applying, ensure the surface is dust-free by wiping it with a damp cloth. Use a good quality brush or roller for a smooth finish. Two coats often provide the best results, so plan accordingly. Have you ever considered how lighting affects color? Think about how your kitchen light interacts with the finish you choose. This can influence the mood and feel of your entire kitchen space. Taking these steps seriously could be the difference between a DIY project and a showroom finish. What finishing touch will make your kitchen cabinets uniquely yours?
Maintenance Tips
Enhance kitchen cabinets with a strip wood design by sanding surfaces first. Secure the strips with wood glue or nails. Finish with a coat of paint or varnish for durability.
Having a stunning strip wood design for your kitchen cabinets can transform the look of your kitchen, but maintaining them is key to ensuring their longevity and beauty. How do you keep them looking fresh and vibrant? Here are some practical maintenance tips that will help you preserve the charm of your strip wood cabinets for years to come.
Cleaning Methods
Keeping your cabinets clean doesn't have to be a chore. Start by dusting them regularly with a soft, lint-free cloth to prevent dirt buildup. For a deeper clean, use a mild soap mixed with warm water. Ensure you wring out the cloth well to avoid excess moisture. Too much water can damage the wood. Remember to dry the surface thoroughly with a dry cloth after cleaning. Have you ever skipped this step and noticed the wood looking dull? It's a simple but effective way to maintain that shine.
Repairing Damage
Scratches and dents can happen, but they're not the end of the world. For small scratches, consider using a wood touch-up pen that matches your cabinet color. These pens can work wonders in concealing those minor imperfections. For deeper dents or chips, you might need wood filler and a bit of sanding. It's a bit more work but still manageable. Have you tried using filler before? It can be surprisingly satisfying to see the surface smooth out. Keep an eye on loose hinges or handles. Tightening them immediately can prevent further damage. Your cabinets will thank you for this quick attention to detail. By embracing these maintenance tips, you ensure your strip wood cabinets remain a centerpiece of your kitchen, radiating warmth and elegance every day. Are you ready to give your cabinets the care they deserve?
Inspiration And Trends
Transform kitchen cabinets with a strip wood design for a modern touch. Choose wood strips that complement your kitchen's style. Install the strips vertically or horizontally for a sleek, fresh look.
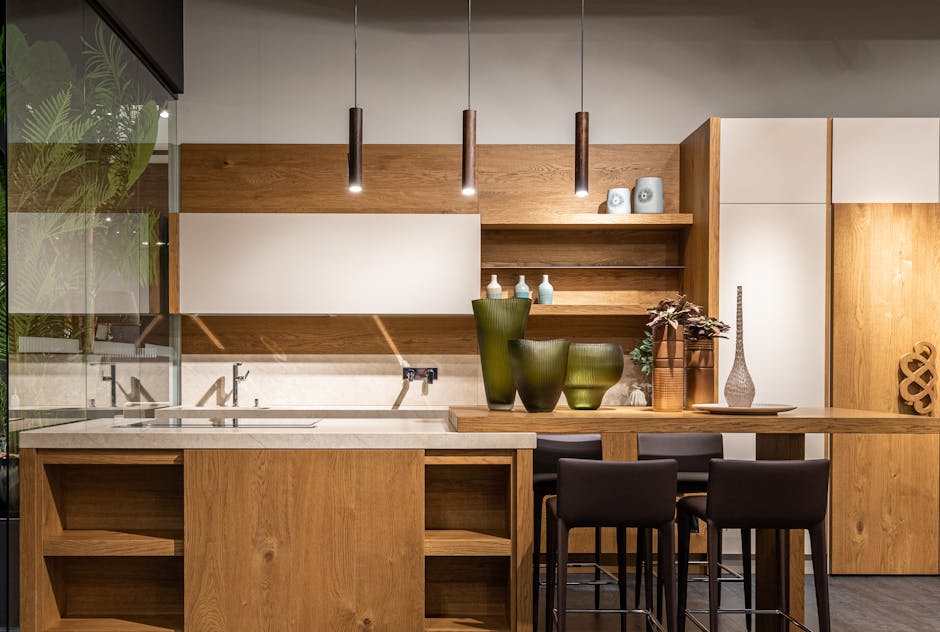
Inspiration and trends in kitchen cabinet design are constantly evolving, with a growing emphasis on natural materials and unique aesthetics. Wood strips offer a versatile option, transforming ordinary cabinets into stunning focal points. Whether you’re remodeling or just looking for a refresh, adding a strip wood design can breathe new life into your kitchen.
Popular Design Ideas
Wood strips are making a strong comeback, celebrated for their timeless appeal and versatility. You can opt for horizontal or vertical strips to create different visual effects. Consider mixing light and dark woods to add depth and contrast. This approach not only enhances the visual appeal but also allows you to play with the existing color palette in your kitchen. Some homeowners prefer a more rustic look, using reclaimed wood strips. They bring a sense of history and character to the space. Are you drawn to the warmth of a farmhouse style? This option might just be your best match.
Innovative Uses Of Wood Strips
Wood strips aren't limited to flat surfaces; think outside the box. Install them diagonally or in chevron patterns for a more dynamic appearance. This can add a modern twist to your traditional kitchen setting. Have you considered using wood strips as a frame for glass cabinet doors? This combination can showcase your beautiful dishware while maintaining a streamlined look. For those who love small but impactful details, integrate wood strips into the cabinet handles or edges. This subtle touch can make a big difference, adding texture and interest without overwhelming the design. Next time you find yourself in a showroom or browsing online, take note of how these trends are being used. Can you see how they might fit into your own kitchen? Embrace the possibilities and let these ideas inspire your next home project.
Frequently Asked Questions
What Materials Are Needed For Strip Wood Design?
To create a strip wood design for kitchen cabinets, you'll need wood strips, a saw, sandpaper, wood glue, and a finish. Choose quality wood that matches your kitchen style. Ensure all tools and materials are ready before starting. This will make the installation process smoother and more efficient.
How To Prepare Kitchen Cabinets For Wood Strips?
Start by cleaning the cabinet surfaces thoroughly. Remove any grease or dirt. Sand the surfaces to create a smooth base. Ensure all cabinet surfaces are dry before applying the wood strips. Proper preparation is key to a successful installation and ensures the wood strips adhere well.
What Is The Best Wood For Kitchen Cabinets?
Oak, maple, and cherry are popular choices for kitchen cabinets. They are durable and have appealing grains. Choose a wood that complements your kitchen's style. Ensure the wood is treated to withstand kitchen conditions. Quality wood contributes to the longevity and aesthetics of your cabinets.
How To Maintain Strip Wood Cabinets?
Regularly dust and clean your strip wood cabinets with a damp cloth. Avoid harsh chemicals that can damage the wood finish. Reapply wood polish periodically to maintain shine and protection. Proper maintenance ensures your wood strip design remains beautiful and durable over time.
Conclusion
Transforming kitchen cabinets with strip wood design is simple and rewarding. This project adds warmth and style to any kitchen. Gather materials and follow each step carefully. Enjoy the process and watch your kitchen change beautifully. This design choice reflects personal taste and creativity.
Invite friends and family to admire your handiwork. With patience and effort, your kitchen becomes a charming space. Start your strip wood design journey today. Experience the joy of a refreshed kitchen look.