Imagine walking into your kitchen and noticing a cozy nook where you can sip your morning coffee or read a book. Now, imagine that this cozy nook also hides a secret—extra storage space for all those kitchen essentials.
Sounds perfect, doesn't it? Building a kitchen bench seat with storage is not only a functional upgrade to your space, but it's also a creative project that adds charm and utility to your home. In this guide, you’ll discover how you can transform a simple idea into a stunning reality.
We’ll explore the steps, the tools you need, and some insider tips to make the process smooth and rewarding. Plus, we'll show you how this DIY project can enhance the overall look and feel of your kitchen while keeping clutter at bay. Ready to unlock the potential of your kitchen space? Let's get started!

Credit: www.youtube.com
Materials And Tools Needed
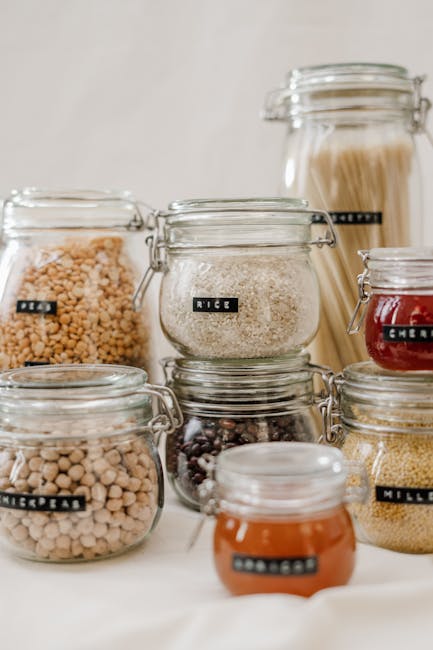
Gather plywood, wood screws, and hinges for the bench structure. Sandpaper and paint help finish surfaces smoothly. A drill, saw, and measuring tape ensure precise assembly and fit.
Building a kitchen bench seat with storage is a rewarding DIY project that combines functionality with style. Before you get started, it's essential to gather the right materials and tools. This ensures not only the success of your project but also the safety and durability of the bench. With the right preparation, you’re setting yourself up for a smooth and enjoyable building experience.
Materials Needed
The materials you choose will greatly affect the bench's sturdiness and appearance. Start with quality wood, such as pine or oak, for the bench frame and seating surface. These woods offer durability and a classic look. You’ll need plywood for the storage compartment, as it’s strong yet easy to work with. Opt for a thickness that supports weight without bending. Don’t forget wood screws and wood glue. These are essential for securing all parts together. Make sure they are suited for the type of wood you’re using. Lastly, gather hinges if you plan to have a lift-up seat for storage access. Choose hinges that can support the weight and allow smooth opening and closing.
Tools Required
Having the right tools will make the building process more efficient. A saw is crucial for cutting wood to size. A circular saw or a jigsaw works well for most projects. Next, ensure you have a drill and a set of drill bits. This will help in assembling the bench and attaching screws precisely. A measuring tape is indispensable for accuracy. Measure twice, cut once to avoid costly mistakes. A sander is useful for smoothing rough edges and surfaces, giving your bench a polished look. Lastly, keep a paintbrush or roller handy if you plan to add a finish or paint to your bench. This will enhance its appearance and protect the wood.
Safety Gear
Safety should never be overlooked. Wear safety goggles to protect your eyes from wood dust and debris. Use ear protection when operating loud tools like saws and drills. Prolonged exposure can affect your hearing. Consider wearing gloves to prevent splinters and improve grip while handling tools and materials.
Organizing Your Workspace
A clutter-free workspace is vital for efficiency and safety. Keep your materials and tools organized and within reach. Consider laying out your tools in the order you’ll need them. This saves time and keeps you focused. Think about how you can prevent distractions. Could you choose a quieter time of day for your project? By gathering these materials and tools, you’re well on your way to creating a kitchen bench seat that not only adds storage but enhances your space. What unique features will you add to make yours stand out?
Choosing The Right Location
Choosing the right location for your kitchen bench seat with storage is crucial. It can make or break the functionality and aesthetics of your kitchen space. Imagine waking up to a cozy nook for your morning coffee or having easy access to your kitchen essentials. The right spot can transform your kitchen into a more organized and welcoming area.
Consider Your Kitchen Layout
Start by examining the overall layout of your kitchen. Is there a corner that feels underutilized? Perhaps, there's an awkward space near a window that could be perfect for a bench seat. Use these spaces to maximize functionality. I once had a tiny corner that seemed useless until I added a bench seat. It became the perfect reading nook!
Assess Traffic Flow
Think about how you move through your kitchen daily. You don't want your bench seat to block pathways or make cooking cumbersome. Instead, it should enhance the flow. Picture how you'll use the space when cooking or entertaining. You’ll thank yourself for keeping the area accessible.
Evaluate Natural Light
Consider placing your bench seat near a window. Natural light can make the space inviting and cozy. A seat bathed in sunlight can be your escape spot during chilly days. I positioned mine near a large window, and it became the family's favorite place to relax.
Proximity To Kitchen Essentials
Ensure your bench seat is close to essential areas like the pantry or fridge. The storage beneath the seat should be easily accessible. This way, you can seamlessly grab snacks or supplies without disrupting your cooking routine. Imagine the convenience of having everything within arm's reach.
Think About Future Needs
Plan for how your kitchen might evolve. You might need more storage or seating as your family grows. Consider if the chosen spot can accommodate future changes. Reflect on your lifestyle and how the space can adapt over time. It’s an investment in comfort and practicality.
Choosing the right location requires a mix of practicality and vision. How will this addition improve your daily life? Will it become a cherished spot for family gatherings or a peaceful retreat for you? The perfect location can transform your kitchen experience, making every moment spent there enjoyable and efficient.
Design And Measurements
Designing a kitchen bench seat with storage involves careful planning. Getting the measurements right is crucial. It ensures the bench fits perfectly in your kitchen. A well-designed bench enhances both style and function. This section guides you through the process. From determining the dimensions to creating a blueprint.
Determining The Dimensions
Start by measuring the available space. Use a tape measure for accuracy. Consider the bench's height, width, and depth. Standard benches are about 18 inches high. This height is comfortable for sitting. Ensure the width fits your kitchen layout. The depth should allow for ample storage. Leave enough space for easy movement around the bench. Think about how many people will use the bench. More users need a longer bench. Remember to account for any existing furniture or fixtures.
Creating A Blueprint
A blueprint helps visualize your design. Sketch the bench on graph paper. Include all dimensions and details. Mark where storage compartments will go. Decide on the type of storage—open or closed. Open storage is easy to access. Closed storage keeps items hidden. Label sections clearly in your sketch. Use online design tools for more precision. Adjust your design as needed. Keep functionality in mind while designing. A well-thought-out blueprint saves time and effort. It also minimizes errors during construction.
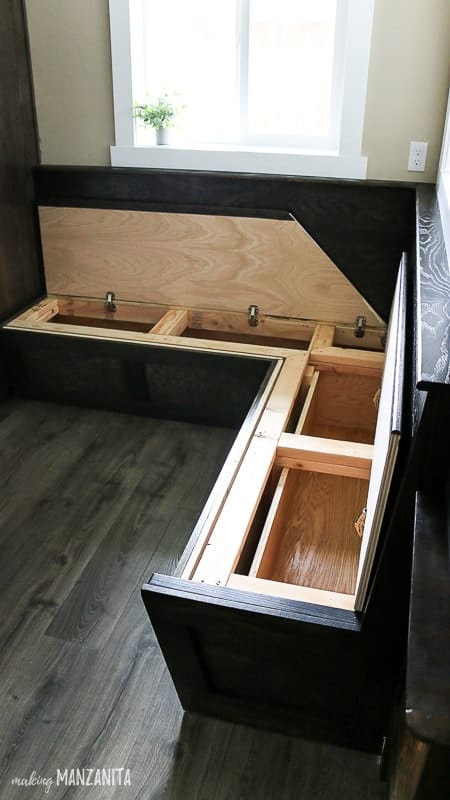
Credit: www.makingmanzanita.com
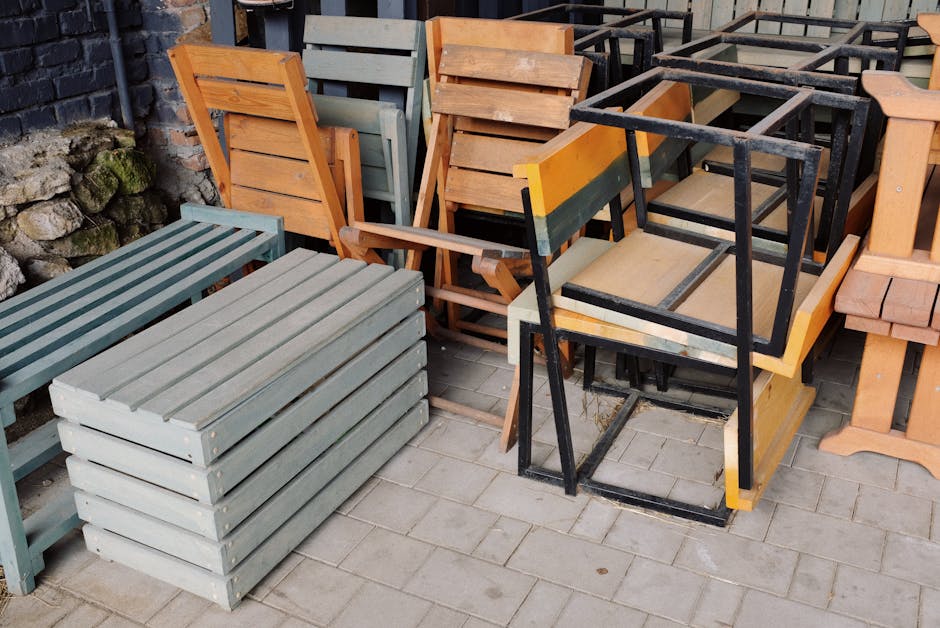
Cutting And Preparing Wood
Building a kitchen bench seat with storage starts with cutting and preparing wood precisely. Measure and saw wood pieces to fit the bench design. Sand edges for smoothness, ensuring a perfect fit during assembly.
Cutting and preparing wood is a crucial step in building a kitchen bench seat with storage. This process ensures that each piece fits perfectly and functions well. A well-cut piece of wood contributes to the bench's durability and aesthetics. Paying attention to detail during this phase can make or break the final product. Let's dive into the specifics of this step.
Selecting The Type Of Wood
Choosing the right wood is vital. Consider durability, appearance, and cost. Hardwood like oak or maple offers strength and longevity. They resist wear and tear effectively. Softwood, such as pine, is cheaper and easier to work with. It might not last as long, though. Think about your needs and budget.
Cutting To Size
Measure twice, cut once. This old adage saves time and materials. Begin with a detailed plan. Mark each piece clearly. Use a straight edge for precision. A circular saw or table saw works best for straight cuts. Ensure safety by wearing goggles and gloves. Make sure all pieces align perfectly before finalizing.
Building The Frame
Building the frame is the backbone of your kitchen bench seat. It provides the structure and support needed for durability. This process involves assembling the base and securing the frame. With basic tools and materials, you can create a strong foundation.
Assembling The Base
First, gather your materials. You’ll need wooden boards, screws, and a drill. Start by cutting the boards to the required lengths. Use a saw for precise cuts. This ensures a snug fit.
Next, lay out the boards to form a rectangle. The longer boards are for the front and back. The shorter ones go on the sides. Align them carefully, ensuring they meet at the corners.
Drill pilot holes at each corner. This prevents the wood from splitting. Secure the boards with screws. Tighten them firmly for stability. Check that the base is level. Use a spirit level for accuracy.
Securing The Frame
Once the base is ready, begin securing the frame. Attach vertical supports at each corner. These will hold the seat in place. Measure and cut the supports to the correct height.
Position the supports inside the base. Drill pilot holes through the base into each support. Fasten with screws. Ensure each support is straight. Use a square to verify right angles.
For added strength, add cross supports. Place them between the vertical supports. Drill and screw them in securely. This reinforces the frame, providing extra stability. Your frame is now ready for the next steps.
Adding Storage Compartments
Building a kitchen bench seat is not just about adding a place to sit; it's also about maximizing the utility of your space. One key advantage of a bench seat is the storage potential. Adding storage compartments can transform your seating area into a functional powerhouse, perfect for stashing away kitchen essentials or those items that never seem to find a home. Imagine having extra space for your cookbooks, table linens, or even your children’s craft supplies, all neatly tucked away yet easily accessible.
Designing Storage Space
Before you start cutting wood, take a moment to think about what you really need to store. This will guide the size and number of compartments. If you love baking, you might want a larger compartment for mixer attachments or baking trays.
Consider the aesthetics as well. Do you prefer open compartments for easy access or closed ones for a cleaner look? Sketch out your ideas and measure your space. A detailed plan can prevent headaches later on and ensure every inch is utilized effectively.
Have you ever found yourself wishing you had just a bit more room for your kitchen gadgets? Designing your storage space thoughtfully can turn that wish into reality.
Installing Dividers
Once you've got your compartments planned, it's time to install dividers. These help organize your storage space and keep everything in its place. Use sturdy materials like plywood for durability.
Measure the height and width of each compartment before cutting your dividers. Secure them with wood glue and screws for a solid fit. If you're feeling adventurous, you could even add adjustable dividers to customize your storage as your needs change.
Have you ever tried to find something in a cluttered drawer? Installing dividers in your bench seat can prevent this frustration and make your life easier.
What creative storage solutions have you thought about for your kitchen bench seat? Share your ideas and inspire others to think outside the box!
Constructing The Seat
Crafting a kitchen bench seat with storage combines function and style. Begin by selecting durable materials for longevity. Maximize space by incorporating built-in storage solutions under the seat.
Constructing the seat of your kitchen bench with storage is a rewarding phase that brings your project to life. This part of the build is where functionality meets design, providing a comfortable seating area while maximizing your storage capacity. It’s essential to balance aesthetics with practicality, ensuring that your bench seat is both sturdy and stylish.
Attaching The Top
Start by selecting a durable material for the seat top. Plywood or hardwood are excellent choices, offering strength and a smooth finish. Measure the storage box carefully, and cut the top to fit snugly, leaving a slight overhang if you prefer a more traditional look. Secure the top to the storage box using hinges at the back. This setup allows easy access to the storage beneath. Ensure the hinges are robust to handle frequent lifting and closing. You might want to add a soft-close mechanism to prevent slamming, which can extend the life of your bench.
Ensuring Stability
Stability is crucial; no one wants to sit on a wobbly bench. Reinforce the bench seat with additional support, such as cross braces beneath the top. These can be made from the same material as your storage box for a cohesive appearance. Check for evenness by placing a level on the seat. Adjust the legs or supports if needed to eliminate any wobble. Consider adding non-slip pads under the legs for extra stability and floor protection. Have you ever tried sitting on a bench that felt like it might tip over? It's unnerving and uncomfortable. Avoid this by double-checking all fastenings and ensuring each joint is tight and secure. Your kitchen bench should feel as solid as a rock. Building a kitchen bench seat with storage is a project that combines creativity with utility. As you construct the seat, remember to focus on these key aspects to ensure a lasting and beautiful addition to your home. Have you considered how this new bench will transform your kitchen space?
Credit: www.hgtv.com
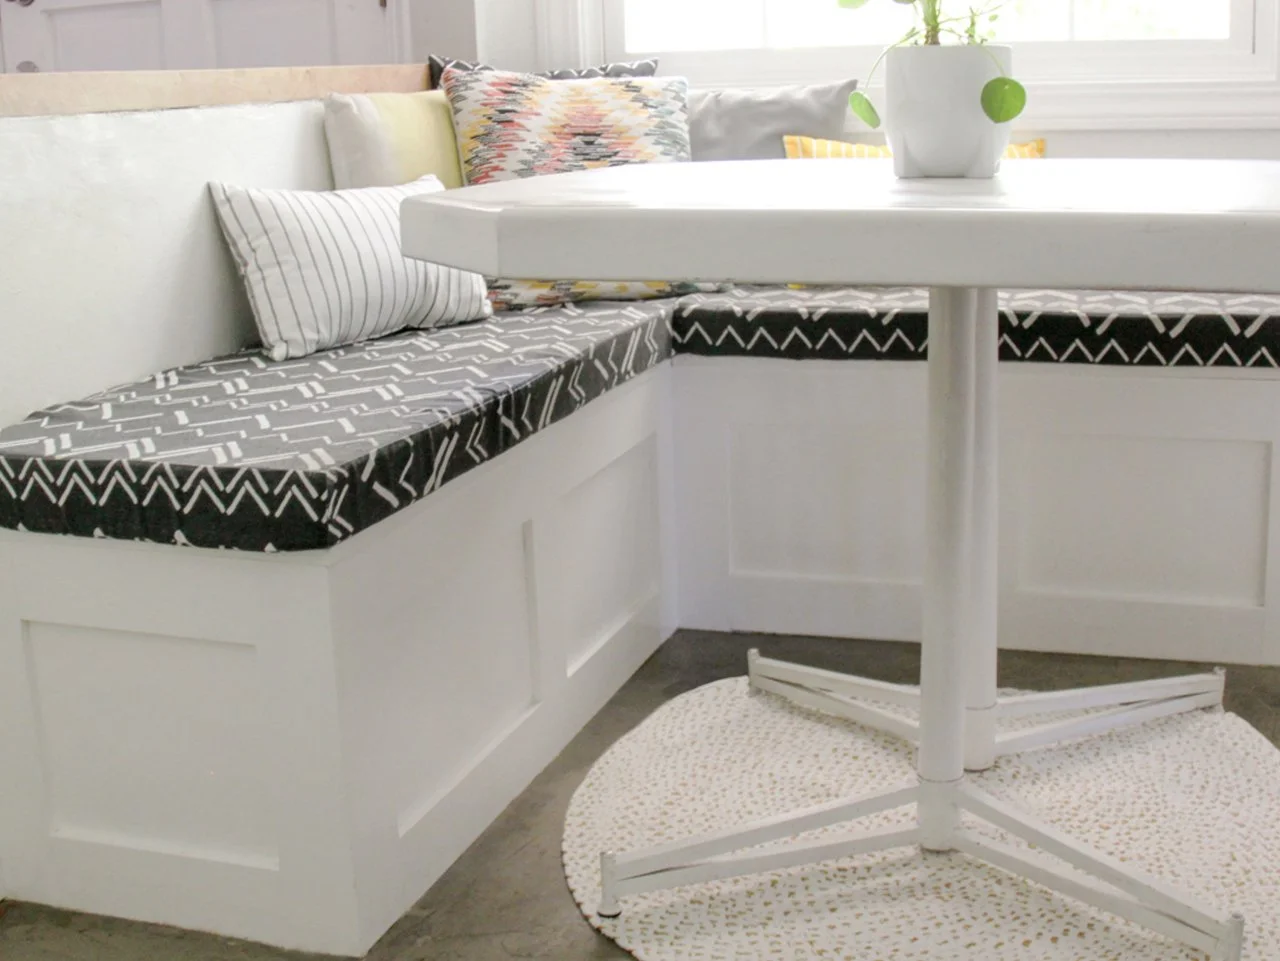
Finishing Touches
Adding finishing touches to your kitchen bench seat with storage enhances both style and function. Paint the seat to match your kitchen decor. Consider cushions for added comfort and a cozy feel.
After you’ve assembled your kitchen bench seat with storage, it’s time to focus on the finishing touches. This stage is crucial as it can transform your project from basic to beautiful. By paying attention to the details, you ensure that your bench is not only functional but also visually appealing. Let’s delve into the steps that will help you achieve a polished finish.
Sanding And Smoothing
Sanding is essential for achieving a smooth surface. Begin with a coarse-grit sandpaper to remove any rough spots or splinters. Gradually move to a finer grit for a sleek finish. Make sure to sand in the direction of the wood grain. This prevents scratches and helps the wood look its best. Don't forget to sand the edges and corners for a safe, rounded finish. Consider using a sanding block for more control. It can make the job easier on your hands. A smooth surface also ensures better adhesion for paint or stain.
Applying Paint Or Stain
Choosing between paint and stain is a matter of preference. Paint offers bold color options, while stain highlights the wood's natural beauty. Think about your kitchen’s overall look when making this decision. If you opt for paint, use a primer first. It helps the paint adhere better and last longer. For stain, apply it evenly with a brush or cloth, and wipe away any excess for an even finish. Consider applying a clear sealant once the paint or stain has dried. This protects the wood from moisture and wear. A well-sealed bench can withstand the hustle and bustle of a busy kitchen. As you complete these finishing touches, step back and admire your handiwork. Does your bench reflect your style? Would you change anything if you were to do it again? These reflections can guide future projects and ensure continual improvement in your DIY endeavors.
Installing The Bench
Crafting a kitchen bench seat with storage transforms space and adds functionality. Begin by measuring your area accurately. Use sturdy wood and ensure proper assembly for lasting durability. Enhance the design with cushions for comfort and style, making it a practical and cozy addition to your kitchen.
Building a kitchen bench seat with storage can transform your cooking space, adding both style and functionality. You’ve gathered your materials, cut your wood, and now it’s time for the exciting part: installing the bench. This is where your vision takes shape, turning your kitchen into a more organized and cozy hub.
Positioning In The Kitchen
Positioning your bench correctly is crucial for maximizing space and functionality. Start by measuring the area where you plan to install the bench. Use painter’s tape to outline the bench's footprint on the floor. Think about how you use your kitchen. Do you want your bench close to the dining table for extra seating? Or perhaps near a window where you can enjoy a cup of coffee? Ensure that the positioning allows for easy access to storage. You don’t want to block cabinet doors or create a traffic jam in your kitchen. Once you’re satisfied with the placement, it’s time to secure it.
Securing To The Wall
Securing the bench to the wall is a must for stability and safety. Use a stud finder to locate the studs behind your wall. Anchoring your bench to these studs will provide the strongest hold. Drill pilot holes through the backboard of the bench into the studs. This prevents the wood from splitting and makes it easier to insert screws. Use wood screws that are long enough to penetrate the studs securely. Tighten them until the bench feels solid and doesn’t wobble. Consider adding L-brackets for additional support. These can be attached underneath the bench, where they’re out of sight but still effective. Have you thought about how this new seating arrangement will change your kitchen dynamics? Your bench isn’t just a piece of furniture; it's a new gathering spot.
Tips For Maintenance
Building a kitchen bench seat with storage adds functionality and charm. Keeping it in good condition requires regular maintenance. Proper care ensures longevity and keeps it looking fresh. Here are some essential tips to maintain your kitchen bench seat effectively.
Regular Cleaning
Dust and dirt can accumulate quickly. Wipe the bench seat with a soft, damp cloth weekly. Use mild soap for tougher spots. Avoid harsh chemicals. They can damage the finish.
Avoid Excessive Moisture
Excessive moisture can harm the wood. Wipe spills immediately with a dry cloth. Use coasters under drinks to prevent water rings. This keeps your bench in top shape.
Inspect For Damage
Check your bench for loose screws or hinges monthly. Tighten them to avoid further damage. Look for scratches or dents. Repair them with wood filler and paint touch-ups.
Protect From Sunlight
Direct sunlight can fade the bench's color. Place it away from windows. Use curtains or blinds to block strong sunlight. This helps maintain its original color longer.
Use Furniture Polish
Apply furniture polish every few months. It adds a protective layer and shine. Use a product suitable for your bench's material. Follow instructions carefully.
Frequently Asked Questions
How To Choose Materials For Bench Seat?
Selecting materials depends on durability, budget, and style. Opt for sturdy wood like oak or plywood for longevity. Consider upholstery fabric for comfort and aesthetic appeal. Waterproof materials are ideal for kitchens to handle spills and moisture, ensuring your bench seat remains functional and attractive over time.
What Tools Are Needed For Construction?
You'll need basic carpentry tools like a saw, drill, and measuring tape. A hammer and screwdriver are essential for assembling parts. Sandpaper is useful for smoothing edges. Consider safety gear like gloves and goggles. Having these tools will streamline the construction process and ensure precise results.
Can I Customize Storage Options?
Yes, customizing storage is highly recommended. You can add shelves, drawers, or compartments based on your needs. Adjustable dividers can optimize space for different items. Tailor the storage to fit cookware, dining essentials, or personal items. Customization ensures your bench seat is functional and meets your specific requirements.
How Long Does Construction Typically Take?
Construction time varies based on design complexity and experience. Simple designs may take a weekend to complete. Detailed plans with intricate storage might require more time. Allocate extra days for painting and finishing touches. Planning ahead ensures a smoother process and helps manage expectations effectively.
Conclusion
Creating a kitchen bench seat with storage is a rewarding project. You save space while adding functionality. The process is simple with the right tools and materials. Measure your space carefully. Choose sturdy materials for durability. Assemble with patience and precision.
Customize with cushions for comfort and style. Enjoy a cozy nook that keeps your kitchen tidy. A perfect blend of utility and design. Now, your kitchen is more organized. Plus, it looks great! Take pride in your handiwork. Your kitchen feels more inviting.
A wonderful spot to relax and store essentials.