
Are you tired of cluttered countertops and overflowing kitchen cabinets? Imagine having a stylish solution that not only provides extra seating but also offers hidden storage to keep your kitchen organized.
Building kitchen benches with storage is a game-changer for any home, blending functionality with a sleek design. You'll discover how easy it can be to transform your kitchen space into an efficient and inviting area. Dive into this guide, and you'll find step-by-step instructions, tips, and inspiration that make the process simple and enjoyable.
Get ready to unlock the potential of your kitchen by turning unused spaces into a tidy and stylish haven!
Materials And Tools
Creating kitchen benches with storage offers functionality and style to your home. The process starts with gathering essential materials and tools. These elements ensure your bench is sturdy and durable. Selecting the right items impacts the project's success.
Materials Required
Wood is the primary material for kitchen benches. Choose hardwood like oak or maple for durability. Plywood is another option for a budget-friendly choice. Finish wood with varnish or paint for protection and appearance.
Screws and nails are essential for securing the pieces. Choose rust-resistant types for longevity. Hinges are needed if your bench has a flip-top lid. Ensure they are strong enough to handle regular use.
Storage requires bins or baskets for organization. Plastic or woven materials work well. Select sizes that fit within your bench's dimensions.
Tools Needed
A saw is crucial for cutting wood. A circular saw or hand saw will suffice. A drill is necessary for making holes and inserting screws. Electric drills speed up the process.
Sandpaper smooths rough edges, preventing splinters. A measuring tape ensures accuracy in your cuts. A square helps maintain right angles. A level checks the bench's balance, ensuring it sits evenly.
Clamps hold pieces together while working. A hammer helps secure nails. Safety gear like goggles and gloves protects you during construction.
Choosing The Right Design
Selecting the perfect design for kitchen benches with storage enhances functionality and aesthetics. Consider the bench's dimensions and style to match the kitchen space. Prioritize durable materials that withstand daily use while providing ample storage solutions.
Choosing the right design for your kitchen bench with storage is crucial. It not only impacts the functionality but also the aesthetics of your kitchen. Whether you’re a seasoned DIY enthusiast or a beginner, finding a design that suits your space and style can elevate the whole experience of using and enjoying your kitchen.
Assessing Your Space
Before you start sketching ideas or browsing Pinterest, take a close look at your kitchen space. Measure the area where you plan to install the bench. Consider the flow of movement in your kitchen. Is there enough room for you to open cabinet doors or drawers? Think about how often you entertain guests. Do you need extra seating or is storage your main priority?
Selecting A Style
Once you understand your space, think about the style that matches your home. Do you prefer a rustic farmhouse vibe or a sleek modern look? Look at the existing elements in your kitchen. What colors and materials are already there? Mixing styles can be exciting, but ensure they complement each other. You don’t want your bench to stand out for the wrong reasons. Ask yourself, what will make you smile every time you walk into your kitchen? Personalize it with details like cushions or decorative knobs. A friend of mine added a small chalkboard to her bench for family notes, and it became a fun focal point. Remember, the right design is about balancing function and beauty. How can you make your kitchen bench both practical and visually pleasing?
Measuring And Planning
Begin by measuring your kitchen space to ensure the bench fits perfectly. Plan the design with storage options to maximize functionality. Consider materials that complement your kitchen's style while providing durability.
Building kitchen benches with storage is a practical and rewarding project that combines functionality with creativity. Before you start cutting wood or shopping for materials, the most crucial step is measuring and planning. This phase sets the foundation for your project, ensuring everything fits perfectly and meets your needs. Let's dive into the details to make your kitchen bench project a success.
Taking Accurate Measurements
Accurate measurements are the backbone of any successful DIY project. Begin by measuring the space where you intend to place the bench. Use a measuring tape to get the length, width, and height. Consider any obstacles like windowsills or heating vents that may affect the size of your bench. Double-check your measurements for accuracy. This can save you time and money later on.
Sketching Your Plan
With your measurements in hand, it’s time to sketch your plan. You don’t need to be an artist; a simple drawing will do. Outline the dimensions and include any compartments or shelves you want in your bench. Think about how you'll use the storage space. Do you need compartments for shoes, or perhaps a spot for cookbooks? As you sketch, visualize the final product. It helps to see if your design will meet your expectations. Would you like a cushioned top for comfort, or perhaps a wooden surface that’s easy to clean? Take a moment to consider these details. Your sketch is your blueprint, guiding you through the building process. So, make sure it accurately reflects your vision. Planning your kitchen bench with storage isn’t just about fitting it into your space; it’s about making it fit into your life. What features will make it most useful for you? By thinking this through, you ensure your bench is both practical and beautiful.
Preparing The Workspace
Creating a well-organized workspace is essential for building kitchen benches with storage. A clutter-free area helps you focus better on the task. It also ensures safety and efficiency. Let's dive into the initial steps of preparing your workspace.
Clearing And Organizing
First, remove unnecessary items from your work area. A clean space reduces accidents and distractions. Sort tools and materials you'll need. Place them in easy-to-reach spots. Use shelves or bins for storage. Keep the floor clear for movement. This setup saves time during the building process.
Gathering Necessary Tools
Collect all tools required for the project. Essential tools include a saw, drill, and measuring tape. Make sure each tool is in good working condition. Gather screws, nails, and wood glue. Arrange them neatly on a table. Having everything ready streamlines your workflow. You'll avoid unnecessary interruptions by preparing in advance.
Cutting The Wood
Cutting the wood is a crucial step in building kitchen benches with storage. Accurate cuts ensure your bench is sturdy and fits perfectly in your kitchen space. This section will guide you through selecting the right wood and mastering cutting techniques.
Selecting The Right Wood
Choose wood that matches your kitchen's style. Pine is affordable and easy to work with. Oak offers durability and a classic look. Make sure the wood is straight and free from defects. Quality wood ensures a strong bench.
Cutting Techniques
Use a circular saw for straight cuts. Measure twice, cut once. This old saying helps avoid mistakes. Clamp the wood to a stable surface before cutting. For curved cuts, a jigsaw is ideal. Always wear safety glasses during cutting. Sand edges smooth to prevent splinters. Proper cutting techniques lead to a professional finish.
Assembling The Frame
Building a kitchen bench with storage involves several key steps. Assembling the frame is crucial. It provides the structure and support for your bench. This section guides you through building the base and constructing the back. Follow these steps for a sturdy and functional kitchen bench.
Building The Base
Start by gathering your materials. You'll need wooden planks, screws, and a drill. Measure the area where the bench will sit. Cut the wooden planks to fit this space. This ensures a perfect fit. Lay the planks on the floor. Arrange them in a rectangular shape. Secure the corners with screws. This forms the base of your bench. Make sure it's level. Use a spirit level for accuracy. A stable base is essential.
Next, add support beams. Place them evenly across the frame. These beams provide additional strength. Screw them into place securely. Double-check their alignment. A strong base prevents future wobbling. Your bench is only as good as its foundation. So, take your time with this step.
Constructing The Back
With the base ready, move on to the back. Begin by measuring the height of your desired backrest. Cut wooden planks to this measurement. Attach them vertically to the base. Use screws to secure each plank. Space them evenly for a uniform look. Ensure they are upright and firm.
Now, consider the angle of the backrest. A slight tilt adds comfort. Use angled brackets to achieve this. Attach them at the base and top of each plank. This helps maintain the desired angle. Check the stability of the backrest. Adjust if necessary. A well-constructed back enhances both comfort and aesthetics.
Adding Storage Features
Explore creative ideas for kitchen benches with added storage. Maximize space by integrating shelves and drawers beneath seating. Efficient design brings practicality and style to your cooking area.
Adding storage features to your kitchen benches maximizes space. It turns your kitchen into a more organized area. These features also enhance the functionality of your benches. By integrating smart storage solutions, you can keep your kitchen tidy. This makes it easy to access utensils and other kitchen essentials. Let's explore some ways to add storage features to your kitchen benches.
Integrating Shelves
Shelves provide open storage for easy access. They are ideal for storing frequently used items. You can install shelves under the bench. This utilizes the space efficiently. Use materials that match your kitchen decor. This keeps the design cohesive. Adjustable shelves offer flexibility. You can change their height to fit different items. This adaptability is useful for storing items of various sizes.
Installing Drawers
Drawers offer hidden storage solutions. They keep the kitchen neat and clutter-free. Choose deep drawers for larger items. Shallow drawers work well for utensils. Soft-close mechanisms ensure quiet operation. This adds a touch of luxury to your kitchen. Organizers within the drawers enhance functionality. They help in keeping things sorted and accessible.
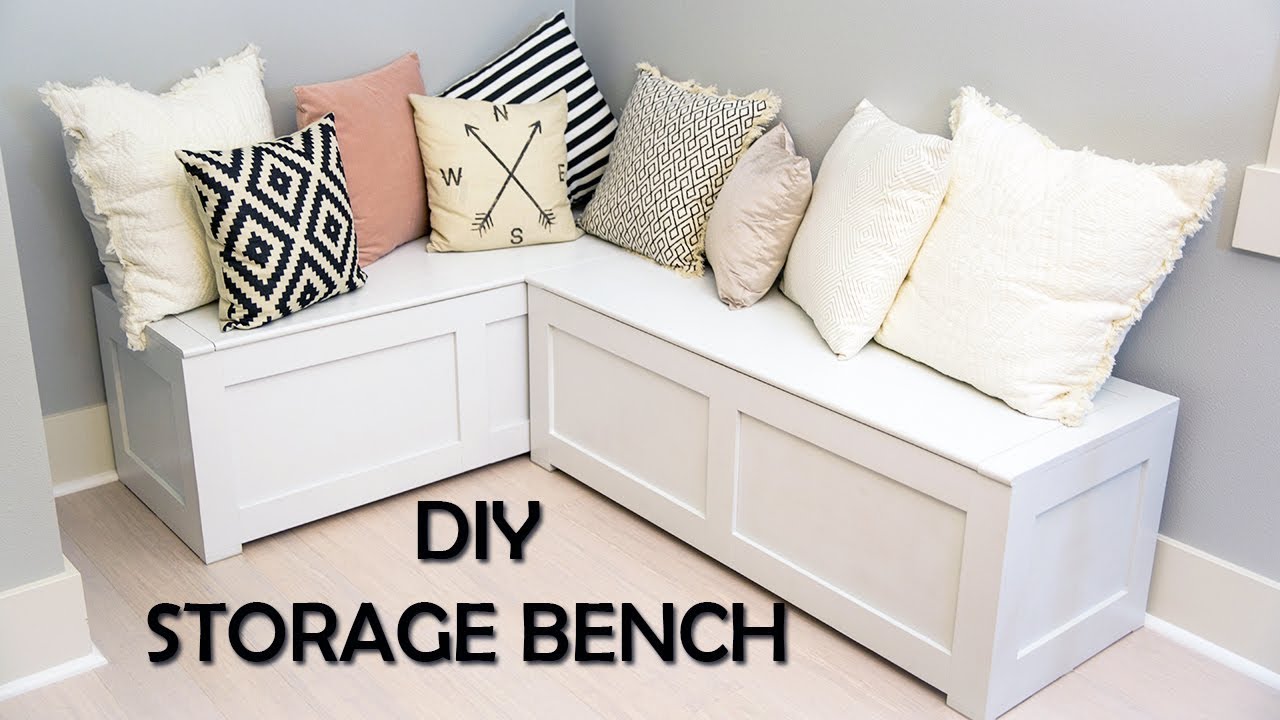
Credit: www.youtube.com
Finishing Touches
Transform your kitchen with benches that double as storage. Enhance functionality by selecting durable materials and incorporating clever compartments. Elevate your space with stylish finishes for a seamless look.
Once you've built the structure of your kitchen bench with storage, it's time to focus on the finishing touches. These details elevate your project from functional to fabulous. The finishing phase is where you add personality, ensuring your bench not only serves its purpose but also enhances your kitchen’s aesthetic.
Sanding And Smoothing
Start by sanding the entire bench surface. Use a medium-grit sandpaper to eliminate rough spots and ensure a smooth finish. A smooth surface is crucial for the next steps, as it allows paint or stain to adhere properly. I remember my first DIY project where I underestimated the power of a good sanding. The paint job ended up uneven, reminding me of the importance of patience during this step. Check all corners and edges. They often need extra attention to avoid splinters. Your goal is to create a surface that's inviting to touch.
Applying Paint Or Stain
Decide whether you want to paint or stain your bench. Paint offers a broader range of colors, perfect for matching your kitchen’s theme. On the other hand, stain highlights the natural beauty of wood, adding warmth and character. Before applying, test your chosen color on a scrap piece of wood. This ensures it looks just as you imagined. Apply a primer if you’re painting; this helps the paint stick better and last longer. Use a good quality brush or roller for a smooth finish. If you’re staining, apply with a cloth to control the coverage. Consider adding a protective sealant. It shields your bench from kitchen spills and daily wear and tear. Have you ever thought about how a small step like sealing can extend the life of your project? Finally, let it dry completely before using your bench. This waiting period might test your patience, but it’s crucial for a durable finish. By focusing on these finishing touches, you can transform a simple bench into a centerpiece of your kitchen. What personal style will you infuse into your bench?
Installing The Bench
Installing the bench is the step where your kitchen begins to transform into a more functional and stylish space. This is the moment when your vision starts taking concrete shape. It's crucial to get the installation right to ensure that your bench is both sturdy and practical.
Positioning In The Kitchen
Start by identifying the best spot for your bench in the kitchen. Consider areas that are underutilized but have potential. Think about the flow of movement in your kitchen. You want the bench to enhance, not hinder, your daily activities.
During a recent renovation, I discovered that positioning the bench near the window added natural light and made the kitchen feel more open. Measure the area carefully. Ensure there’s enough space for the bench and for people to move around comfortably.
Securing In Place
Once positioned, securing the bench ensures safety and longevity. Use heavy-duty brackets or anchors to attach the bench firmly to the wall. This step prevents any wobbling or tipping.
Drill holes into the wall studs, not just drywall, for a stronger hold. I once skipped this step in a rush, and the bench felt unstable during use. Don't repeat my mistake. Double-check that everything is level. A lopsided bench can cause discomfort or even accidents.
Does your kitchen have a unique layout or special needs? Tailor your approach to fit these specifics. Installing a kitchen bench is not just about following steps—it's about crafting a space that truly works for you.
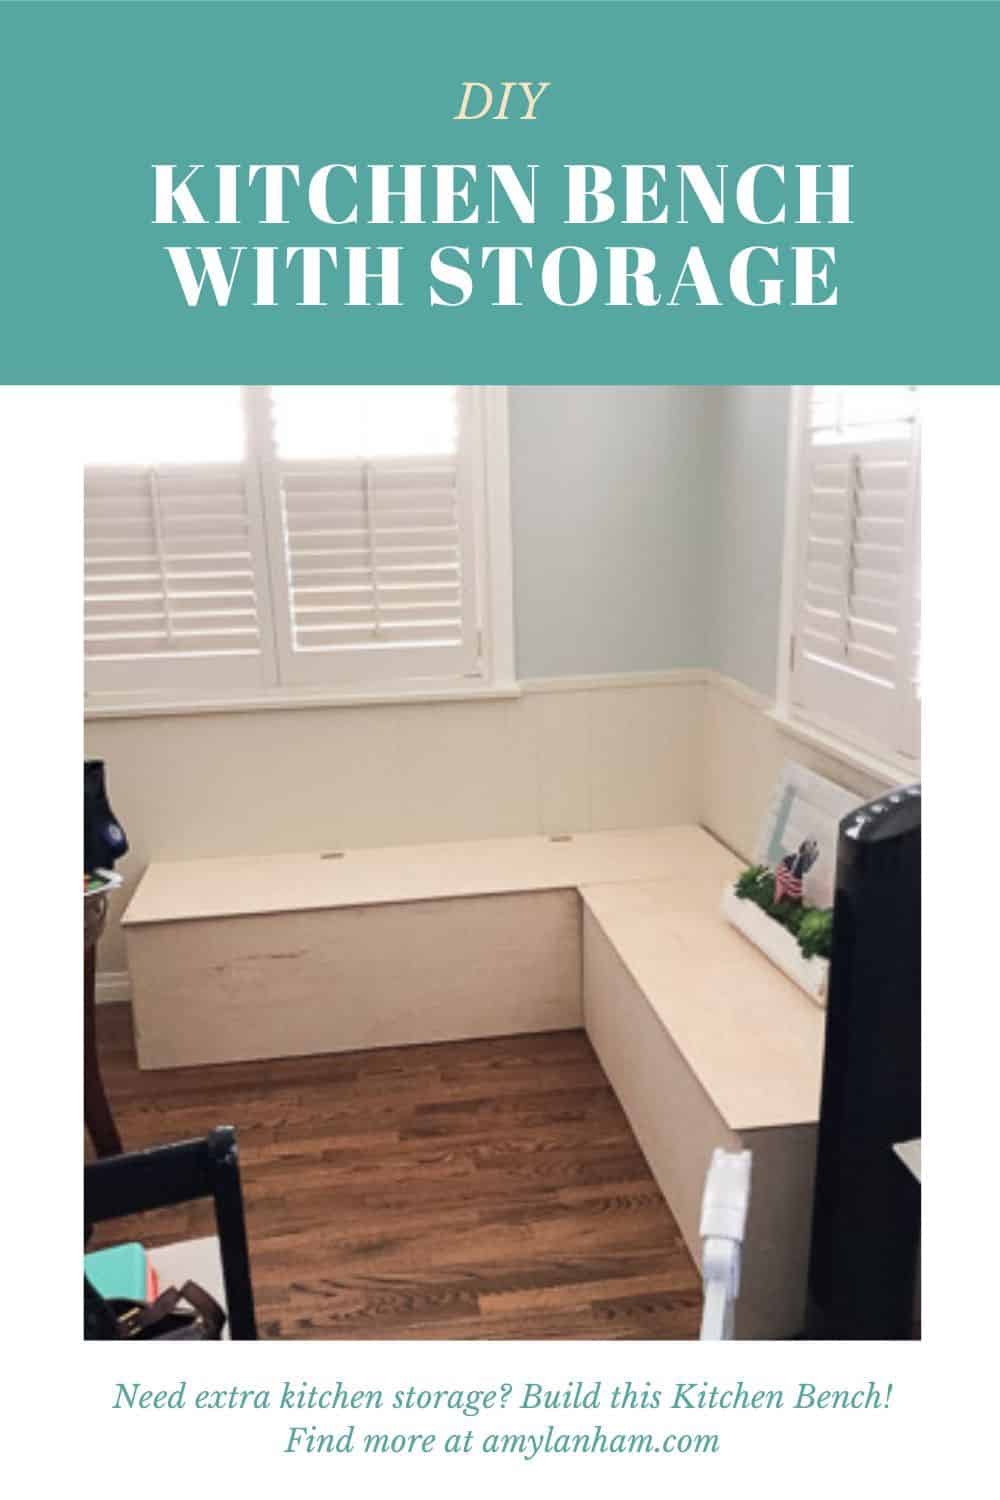
Credit: amylanham.com
Decorating And Customizing
Create functional kitchen benches with storage to maximize space and style. Use wood or metal for sturdy support. Add cushions for comfort while hiding items underneath.
Decorating and customizing your kitchen benches with storage can transform a functional piece into a stunning focal point. By adding personal touches and selecting the right materials, you create a space that reflects your style. This process not only enhances aesthetics but also adds comfort and personality to your kitchen.
Choosing Cushions And Fabrics
Selecting the right cushions and fabrics is crucial to making your kitchen benches inviting. Consider durability along with design. Kitchens are high-traffic areas, so choose fabrics that can withstand frequent use and occasional spills. Opt for colors and patterns that complement your kitchen's theme. If your kitchen is mostly neutral, a pop of color in the cushions can add vibrancy. On the other hand, if you have a colorful kitchen, sticking to neutral cushions can create balance. Think about the level of comfort you desire. Thicker cushions provide more comfort, while thinner ones offer a sleeker look. Would you prefer easy-to-clean materials, or are you willing to invest in professional cleaning for plush, luxurious fabrics?
Adding Personal Touches
Adding personal touches makes your kitchen benches uniquely yours. Consider incorporating family photos or cherished mementos on or around the benches. Use decorative pillows with personal quotes or symbols that have meaning to you. These small details can spark conversations and bring warmth to your kitchen. Think about incorporating storage baskets or boxes beneath the benches that reflect your personal style. Whether it's rustic wicker or sleek metal, these elements add to the bench's functionality while showcasing your taste. Have you thought about how you can use seasonal decorations? Swapping out pillow covers or throws can keep your kitchen fresh and in tune with the changing seasons. Decorating and customizing your kitchen benches is more than just a task—it's an opportunity to express who you are. What will your benches say about you?

Credit: www.reddit.com
Frequently Asked Questions
What Materials Are Best For Kitchen Benches?
When building kitchen benches, opt for durable materials like solid wood, plywood, or MDF. These materials ensure strength and longevity. Additionally, consider using waterproof finishes to protect against spills and moisture. Choosing the right materials is crucial for a functional and long-lasting kitchen bench with storage.
How To Maximize Storage In Kitchen Benches?
To maximize storage, incorporate deep drawers, shelves, or cabinets into your bench design. Use dividers and organizers to keep items neat. Consider adjustable shelving for flexibility. Smart storage solutions enhance kitchen functionality and keep your space organized and clutter-free.
Are Diy Kitchen Benches Cost-effective?
DIY kitchen benches can be cost-effective if you have the right tools and skills. Building your own bench allows customization without the high costs of purchasing pre-made furniture. However, it's essential to plan carefully to avoid unnecessary expenses and ensure a successful project.
What Tools Are Needed For Building Kitchen Benches?
Essential tools for building kitchen benches include a saw, drill, measuring tape, and screwdriver. You might also need clamps, a sander, and a level for precise construction. Having the right tools ensures efficient and accurate assembly of your kitchen bench with storage.
Conclusion
Building kitchen benches with storage is a rewarding project. It maximizes space and adds style. With clear plans, anyone can tackle this task. Start with measuring your space carefully. Choose sturdy materials for lasting use. Assemble with patience and attention to detail.
Paint or stain to match your kitchen decor. Enjoy the extra seating and storage you've created. It’s a practical addition to any home. Now, your kitchen is more organized and welcoming. Happy building!