
Are you tired of cluttered countertops and overflowing kitchen cabinets? Imagine transforming your kitchen into an organized oasis where every pot, pan, and spice jar has its own dedicated spot.
Building your own wood kitchen storage shelves can be the perfect solution to reclaim your space and add a touch of rustic charm to your home. You don’t need to be a woodworking expert to create these shelves. In fact, with a few simple tools and materials, you can craft beautiful and functional storage that perfectly fits your kitchen's style and dimensions.
Dive into this guide, and discover how you can enhance both the aesthetics and efficiency of your kitchen. Stay with us, and by the end, you'll have a clear path to a more organized and stylish kitchen.
Materials And Tools
Building wood kitchen storage shelves requires basic materials and tools. Gather wooden planks, screws, and brackets. Essential tools include a saw, drill, and measuring tape. Follow easy steps to create functional and stylish shelves for your kitchen. Enjoy the satisfaction of crafting your own storage solution.
Building wood kitchen storage shelves begins with gathering the right materials and tools. Choosing quality supplies ensures durability and longevity. Proper tools make the project smoother and more enjoyable. Here’s what you need to get started.
Essential Materials
Wood is the main component for your shelves. Choose plywood or pine for strength and affordability. Decide the thickness based on the weight it will hold. Sandpaper smooths the surface. It prevents splinters. Wood screws hold everything together. Get screws that match the wood thickness. Wood glue is essential for extra stability. Purchase it for strong joints. Use paint or varnish for finishing. It protects the wood and adds style.
Recommended Tools
A tape measure ensures precise cuts. Measure twice, cut once. A saw cuts the wood to size. A circular saw or handsaw works best. A drill helps drive screws into the wood. It saves time and effort. Clamps hold pieces together during assembly. They ensure strong bonds. A level checks shelf alignment. It guarantees a straight installation. A paintbrush or roller applies paint smoothly. Choose the right brush for the finish type. These materials and tools simplify shelf building. They help create sturdy, beautiful kitchen storage. Start gathering them today. Your kitchen shelves await.
Planning Your Design
Crafting wood kitchen storage shelves starts with a thoughtful design plan. Choose sturdy materials and measure your space precisely. Consider shelf height for easy access to stored items.
Planning the design for your wood kitchen storage shelves is crucial. It sets the foundation for a project that not only enhances your kitchen's functionality but also reflects your personal style. Consider this phase as an opportunity to tailor a solution that fits seamlessly into your space. Are you ready to create a masterpiece that organizes your kitchen like never before?
Measuring Your Space
Accurate measurements are the backbone of a successful shelf-building project. Grab a tape measure and assess the area where your shelves will live. Don't forget to note the height, width, and depth. These figures are key to ensuring your shelves fit perfectly and avoid any awkward gaps. Imagine the satisfaction of seeing shelves that look like they were made for your kitchen.
Choosing Shelf Dimensions
Deciding on shelf dimensions is about balancing practicality with aesthetics. Think about what items you plan to store. Are they tall or short, bulky or slim? This helps determine the height and depth of your shelves. Visualize how your spices, pots, or cookbooks will sit on these shelves. The right dimensions can make accessing your kitchen essentials a breeze. Wouldn't it be great if your shelves not only stored items efficiently but also added to the visual appeal of your kitchen?
Cutting The Wood
Building wood kitchen storage shelves starts with cutting the wood precisely. Choose the right type of wood for durability. Measure carefully, ensuring every piece fits well together for stable shelves.
Cutting wood is a critical step in building your kitchen storage shelves. It requires precision and care to ensure your shelves fit perfectly and are sturdy. Let's dive into the essentials of cutting wood, focusing on maintaining safety and achieving accuracy.
Safety Precautions
Before you start cutting, make safety your priority. Always wear safety glasses to protect your eyes from flying debris. Gloves can safeguard your hands, but be cautious as they might get caught in the saw if not used correctly. Ensure your workspace is clean and organized. Remove any loose items that could cause accidents. Remember, a clutter-free area helps you focus and reduces the risk of mishaps. Check your tools before use. A sharp blade reduces the chance of accidents and ensures cleaner cuts. Are your tools in top condition?
Precise Cutting Techniques
Measure twice, cut once. This old adage holds true especially when cutting wood. Use a reliable measuring tape and mark your wood with a pencil for accuracy. Consider using a square tool to ensure your lines are perfectly straight. Choose the right saw for the task. A circular saw can make quick, straight cuts, while a jigsaw is ideal for curves and intricate designs. Each tool offers different benefits, so select based on your project's needs. Maintain a steady hand and consistent pressure while cutting. Rushing can lead to mistakes and uneven edges. Practice on scrap wood if you're new to using saws. How confident are you in your cutting skills? By focusing on safety and precision, you'll not only build sturdy wood kitchen storage shelves but also gain valuable woodworking skills. Your attention to detail in these early stages sets the foundation for a successful project.
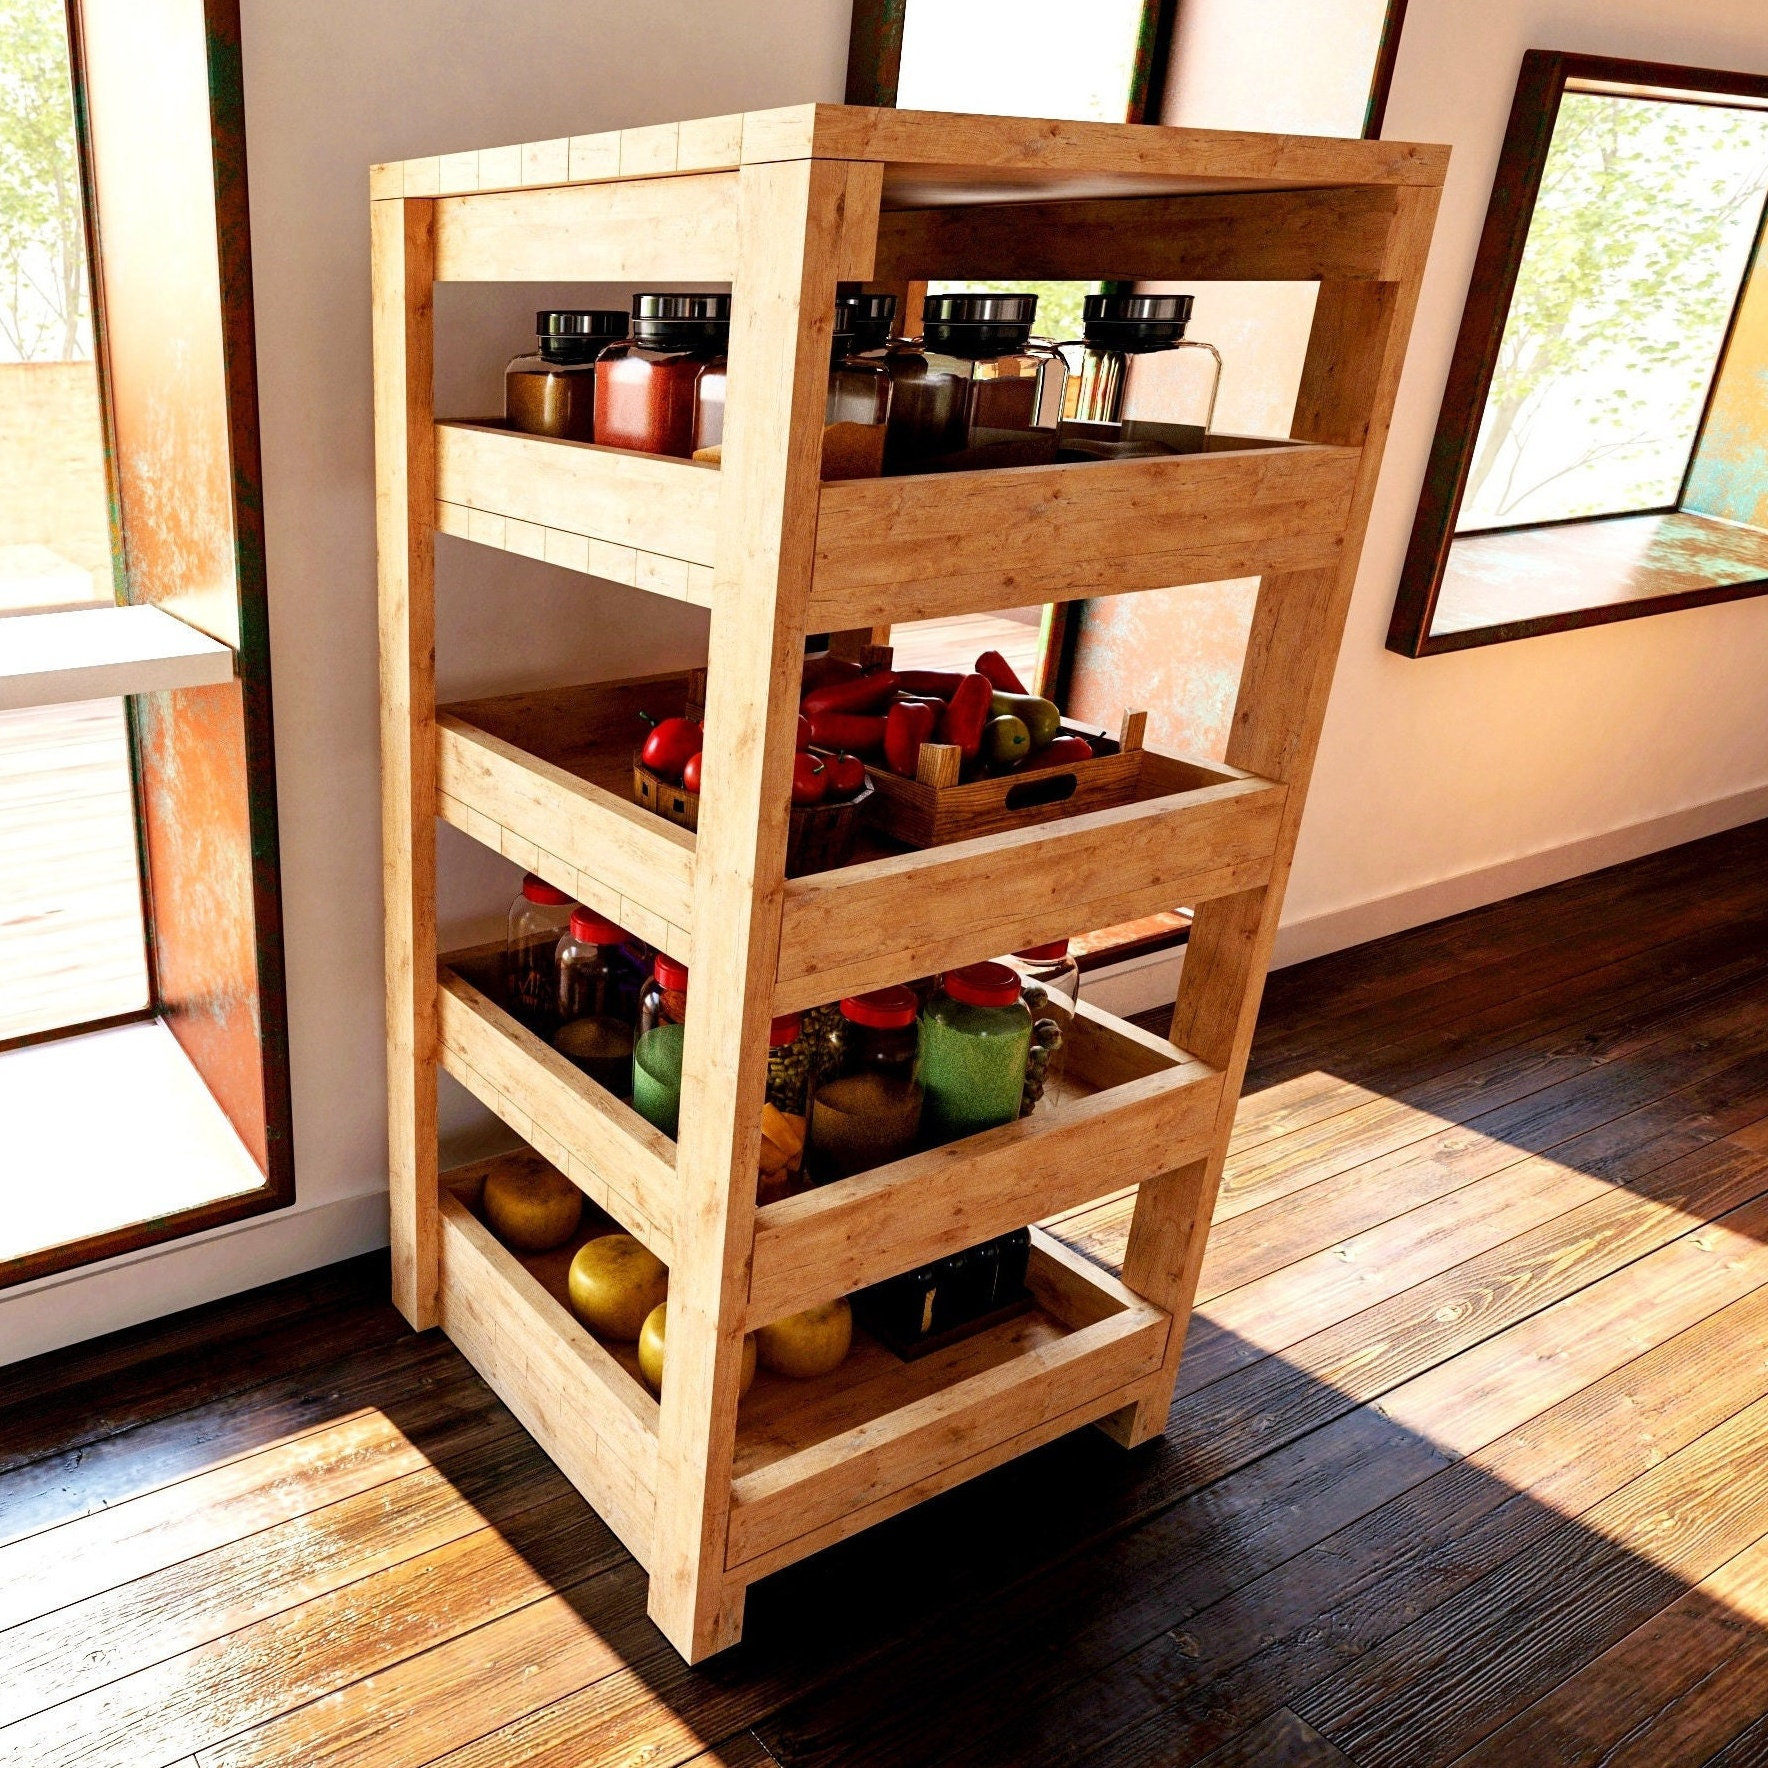
Credit: www.etsy.com
Assembling The Frame
Begin by connecting the wooden pieces to form a sturdy frame for your kitchen shelves. Ensure all joints fit snugly and securely. Stability is key, so double-check each corner and joint for precision and strength.
Assembling the frame is a crucial step in building wood kitchen storage shelves. This process forms the backbone of your shelving unit. It ensures strength and durability. Working carefully and methodically will lead to better results. Let's delve into the essential aspects of assembling the frame.
Connecting The Pieces
Start by gathering all your pre-cut wood pieces. Make sure each piece is clean and smooth. Arrange them according to your design plan. Use screws or nails to join the pieces. Align the edges precisely for a neat finish. This step requires patience and precision.
Ensuring Structural Stability
Structural stability is vital for any shelving unit. Check each joint to ensure it is secure. Reinforce corners with brackets or braces if needed. This adds strength and prevents wobbling. Test the frame by gently shaking it. A stable frame will not move or bend.
Installing The Shelves
Now that you've prepared your materials and planned your design, it's time to move on to the exciting part: installing the shelves. This step is where your vision starts to come to life. Whether you're a seasoned DIYer or a beginner, taking your time during installation will ensure your shelves are both functional and beautiful.
Securing The Shelves
Start by deciding on the height of each shelf. Consider what you will be storing to determine appropriate spacing. Mark these points on the wall using a pencil.
Next, it's important to find the studs in your wall using a stud finder. Shelves secured into studs can hold more weight and are more stable. If there are no studs where you want your shelves, use wall anchors to provide the necessary support.
Once you've identified your anchor points, drill pilot holes for your screws. This prevents the wood from splitting and makes it easier to drive the screws in. Attach the brackets or supports, and ensure they're securely fastened.
Leveling And Alignment
Ensuring your shelves are level and aligned is crucial for both functionality and appearance. Use a spirit level to check that each shelf is perfectly horizontal. An uneven shelf can lead to items sliding off, or worse, the shelf collapsing.
If you're installing multiple shelves, measure the distance between them to ensure uniformity. Consistency in spacing not only looks good but also maximizes your storage space.
Align the front edge of each shelf with the one below it. This creates a clean, professional look. Adjust as necessary before fully securing the shelves in place.
Have you ever installed a shelf only to realize it's slightly crooked? The frustration of re-drilling and adjusting can be avoided with careful planning and checking as you go. Patience at this stage pays off with shelves that are both straight and sturdy.
Remember, the key to a successful installation is taking your time and double-checking your work. Are you ready to transform your kitchen with your new wood storage shelves?
Finishing Touches
Complete your wood kitchen storage shelves with neat edges and smooth surfaces. Sand the wood gently for a polished look. Apply a clear finish to protect and enhance the natural beauty of the wood.
Finishing touches bring your wood kitchen storage shelves to life. These final steps enhance both appearance and durability. They also make your shelves more functional and appealing. Let's dive into the key elements of the finishing process.
Sanding And Smoothing
Sanding is crucial for a smooth finish. Start with coarse sandpaper to remove rough spots. Gradually move to finer grit sandpaper. This ensures a silky-smooth surface. Sand along the grain to prevent scratches. Use a tack cloth to wipe away dust. This prepares the wood for staining or painting.
Applying Stain Or Paint
Staining adds color while showing the wood grain. Choose a stain that matches your kitchen decor. Apply with a clean brush or cloth. Wipe off excess for an even finish. Allow it to dry completely before applying a second coat. Alternatively, paint offers a solid color finish. It covers imperfections and provides a uniform look. Use a primer to help the paint adhere better. Apply thin coats with a brush or roller. Let each coat dry fully before adding another. Both stain and paint protect the wood. They extend the life of your kitchen shelves. Choose the finish that best suits your style and needs.
Mounting The Shelves
Crafting wooden kitchen storage shelves can enhance space and organization. Start by selecting quality wood and sturdy brackets. Measure accurately to ensure a perfect fit, then mount securely for a practical and stylish addition to your kitchen.
Mounting your wood kitchen storage shelves is a crucial step. Proper mounting ensures the shelves are sturdy and safe. Start by selecting a suitable wall. Consider the weight of items you'll store. Here’s a guide to help you mount your shelves effectively.
Wall Anchoring Techniques
Strong wall anchoring prevents shelves from collapsing. Use wall anchors that match your wall type. Drywall, plaster, or concrete each need specific anchors. For drywall, toggle bolts work well. They spread the load across a larger area. For concrete or brick, use masonry anchors. They provide a firm grip within solid walls. Always drill pilot holes first. This reduces wall damage and helps the anchors fit snugly.
Ensuring Load Bearing
Consider the weight your shelves will hold. Use heavy-duty brackets for larger loads. Secure brackets at the studs for maximum support. Use a stud finder to locate them. Spacing brackets evenly is essential. It distributes weight evenly across the shelves. Choose thick wood for the shelves. Thicker shelves handle weight better. Regularly check your shelves for wear and tear. Adjust or replace anchors and brackets if needed.
Credit: www.remodelista.com
Maintenance Tips
Crafting wood kitchen storage shelves requires regular maintenance for durability. Regularly check for loose screws and tighten them. Ensure the wood stays dry to prevent warping. Sand rough edges to avoid splinters. Apply wood polish annually to maintain shine and protect the surface.
Maintaining your newly built wood kitchen storage shelves is crucial to ensure they remain functional and beautiful for years to come. With a little care and attention, you can protect your investment and keep those shelves looking as fresh as the day you made them. Let's delve into some practical maintenance tips that will help you preserve the charm and utility of your kitchen storage shelves.
Regular Cleaning
Keeping your wood kitchen shelves clean is a simple yet effective way to maintain their appearance. Dust and grime can accumulate over time, dulling the wood's natural shine. Use a soft cloth to gently wipe the shelves every week, ensuring you reach the corners where dust tends to hide. For a deeper clean, dampen a cloth with a mixture of mild soap and water. Wipe the surface gently, then immediately dry with a clean towel to prevent water damage. Have you ever noticed how a quick clean makes your kitchen feel instantly more inviting?
Checking For Wear And Tear
Regularly inspecting your shelves for any signs of wear and tear is key to maintaining their integrity. Look for loose screws or nails that might need tightening. An unstable shelf can be a hazard, potentially damaging items stored on it or even causing injury. Check for scratches or dents that might occur over time, especially if you have young children. These can often be easily fixed with wood filler or a touch-up pen. It's amazing how addressing small issues promptly can prevent larger problems down the line. Remember, your shelves are not just storage solutions; they are part of your kitchen's aesthetic. By giving them the care they deserve, you ensure they continue to enhance your space. What maintenance tips have you found useful in keeping your wooden kitchen shelves in top shape?

Credit: www.tiktok.com
Frequently Asked Questions
What Tools Are Needed For Building Shelves?
To build wood kitchen storage shelves, you'll need a saw, drill, screws, and measuring tape. A level ensures accurate installation. Sandpaper smooths the wood surface. Safety gear like goggles and gloves is essential. Choose tools based on shelf design and complexity for best results.
How To Choose The Right Wood?
Select wood based on durability, budget, and aesthetic preference. Hardwoods like oak or maple are sturdy and elegant. Pine is affordable and easy to work with. Consider humidity levels in the kitchen, as it can affect wood longevity. Ensure your choice complements existing kitchen decor.
Can Beginners Build Kitchen Shelves?
Yes, beginners can build kitchen shelves with proper guidance and tools. Start with simple designs and follow step-by-step tutorials. Practice on small projects first. Ensure safety measures are in place. Patience and careful planning are key to success for novices in woodworking.
How To Ensure Shelf Stability?
Ensure shelf stability by using sturdy wood and proper mounting hardware. Consider wall material when choosing anchors. Use a level to check alignment. Distribute weight evenly across the shelf. Regularly check and tighten screws to maintain stability and safety over time.
Conclusion
Building wood kitchen storage shelves is a rewarding project. It adds organization and style to your kitchen. With simple tools and materials, you can create custom shelves. Follow each step carefully for the best results. Measure, cut, and assemble with precision.
Enjoy the satisfaction of a job well done. Your new shelves will enhance your kitchen's functionality. Plus, they provide extra space for your kitchen essentials. Remember, patience and practice make perfect. Enjoy your newly organized kitchen space. Happy building!