Is your kitchen a chaotic puzzle every time you try to prepare a meal? Imagine opening your kitchen cabinets to find everything neatly in place, making meal prep a breeze.
In this video, "How to Organize the Kitchen," we will show you simple yet effective techniques to transform your kitchen into a well-organized haven. You will discover how to maximize space, reduce clutter, and create a kitchen that feels as good as it looks.
By the end of the video, you'll have a clear, actionable plan to turn your kitchen into the heart of your home. Ready to reclaim your kitchen and make cooking enjoyable again? Dive in and see just how easy it can be!
Preparation And Planning
Preparation and planning are the backbone of any successful kitchen organization project. Without a clear plan, your efforts might lead to a cluttered mess instead of a streamlined space. By investing some time upfront, you can save yourself from future headaches and create a kitchen that truly works for you. Let's dive into the essential steps to prepare and plan for your kitchen organization journey.
Assessing Your Space
Start by taking a good look at your kitchen. Notice what works well and what doesn't. Is there a pile of mismatched containers that never seem to have a lid? Do you spend too much time searching for utensils?
Measure your cabinets, drawers, and countertops. Understanding your available space helps in choosing the right organizers. Are your shelves adjustable? Could they be optimized to fit more items?
Consider your lifestyle and cooking habits. If you love baking, maybe your mixer deserves a prime spot on the counter. If you often struggle with finding spices, then a spice rack should be a priority.
Gathering Necessary Tools
Before diving into organizing, gather all the tools you might need. This could include drawer dividers, shelf risers, or even a label maker. Having these tools on hand will streamline your process.
Think about the specific needs of your kitchen. Do you need containers for dry goods? Are you lacking hooks to hang utensils? Make a list and check what you already have before heading to the store.
Consider investing in versatile items that can adapt to changing needs. Adjustable dividers or stackable bins can provide flexibility as your kitchen evolves.
Preparation and planning are key. Assess your space and gather the necessary tools to ensure your kitchen organization is both efficient and tailored to your needs.
How do you plan to tackle your kitchen organization? Share your thoughts in the comments below!
Credit: www.containerstore.com
Decluttering Essentials
Organizing the kitchen begins with decluttering essentials. A tidy kitchen boosts efficiency and joy in cooking. Removing unnecessary items creates space for what truly matters. This section focuses on sorting and deciding what to keep. Let's dive into these vital steps.
Sorting Items
Start by grouping similar items. Gather all your pots, pans, and utensils. Do the same with plates, bowls, and glasses. This makes it easier to see what you have. Place them in categories on the countertop.
Look at each category one by one. Decide which items are used often. Keep these at the front for easy access. Items rarely used can be stored at the back. This method ensures your kitchen remains functional and neat.
Deciding What To Keep
Ask yourself if each item serves a purpose. Do you use it often? Is it in good condition? These questions help decide its value. Items not used for months might be unnecessary.
Consider donating items in good shape. This frees up space and helps others. Keep only what truly enhances your cooking experience. This approach simplifies your kitchen and makes it a pleasure to use.
Creating Zones
Creating zones in your kitchen can streamline your cooking process. This method enhances efficiency and simplifies daily chores. Each zone serves a specific purpose. It helps keep your kitchen organized and clutter-free. Let's delve into how to set up these essential kitchen zones.
Cooking Zone Setup
The cooking zone is where the magic happens. Keep your stove, oven, and microwave close together. Store pots, pans, and utensils within easy reach. Arrange spices and oils nearby for quick access. Use hooks for hanging frequently used tools. This setup saves time and reduces movement.
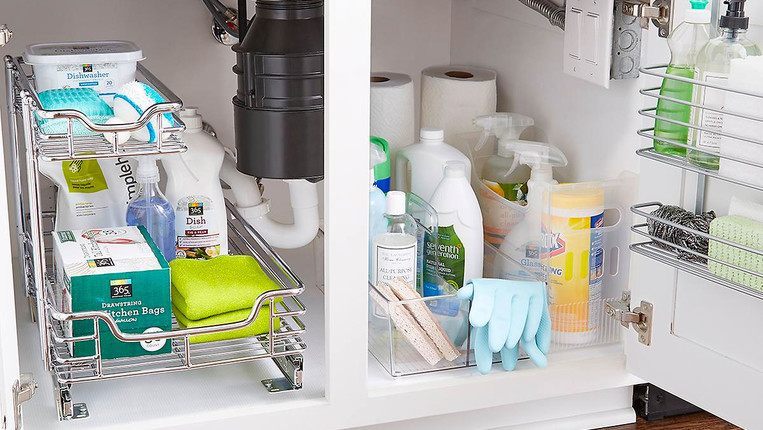
Cleaning Zone Organization
The cleaning zone includes the sink and dishwasher. Place cleaning supplies under the sink for convenience. Organize dish soaps, sponges, and brushes in caddies. Ensure trash bins are close to the cleaning area. Keep towels and drying racks handy. This organization keeps the zone tidy and efficient.
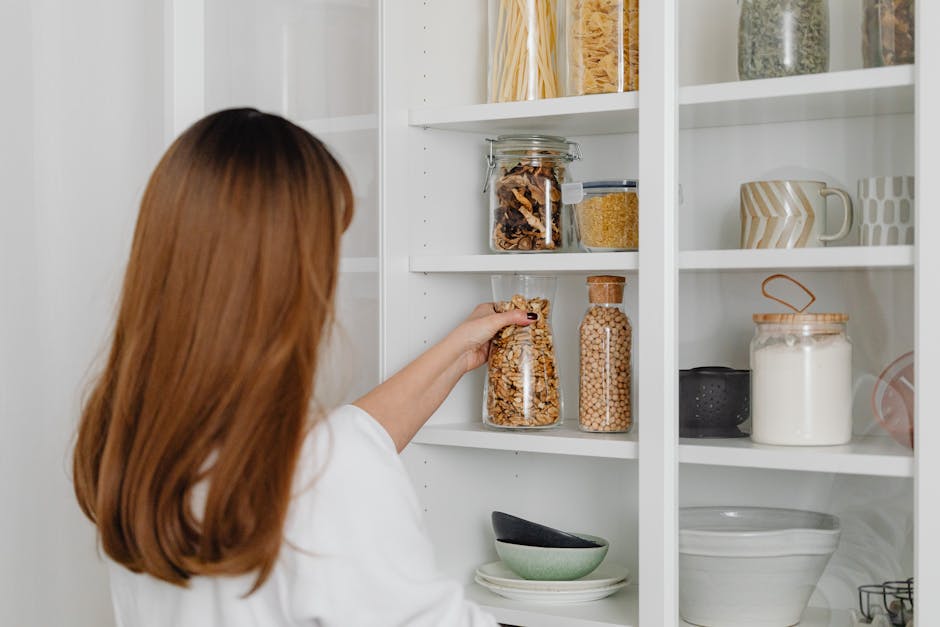
Storage Zone Arrangement
A well-arranged storage zone is crucial. Use cabinets and drawers for storing dishes and glassware. Keep pantry items in labeled containers. Arrange them by category for easy access. Use vertical space with shelves and racks. This arrangement maximizes storage and maintains order.

Credit: www.youtube.com
Maximizing Storage
Organize your kitchen efficiently with practical storage tips. Discover methods to declutter and maximize space in every cabinet. This video guides you through arranging utensils and groceries for easy access.
Maximizing storage in your kitchen transforms your space. It makes cooking and organizing easier. A well-organized kitchen feels inviting. It also enhances functionality. To achieve this, focus on maximizing storage. Clever solutions help you utilize every inch.
Using Vertical Space
Vertical space often remains unused in kitchens. This is a missed opportunity for storage. Install shelves or racks on walls. They can hold pots, pans, and kitchen tools. Use tall cabinets to store less-used items. Stackable bins or containers add more storage options. They help in keeping counters clutter-free. Hanging hooks are great for mugs and utensils. This method saves valuable counter space.
Incorporating Drawer Dividers
Drawers can quickly become chaotic. Drawer dividers are the solution. They help organize utensils, cutlery, and gadgets. Dividers keep everything in its place. This makes items easy to find. Adjustable dividers offer flexibility. You can customize them based on your needs. They also prevent items from shifting around. This keeps your kitchen orderly and neat.
Labeling And Categorizing
Discover how labeling and categorizing transform your kitchen into an organized space. This video guides you in sorting items efficiently, making cooking and cleaning easier. Enjoy a clutter-free kitchen with simple, practical tips.
Organizing your kitchen can feel like a daunting task, but with the right strategies, it becomes manageable and even enjoyable. One of the most effective ways to streamline your kitchen is through labeling and categorizing. By clearly identifying and grouping items, you can create a space that's not only functional but also visually appealing. Let's dive into how labeling containers and grouping similar items can transform your kitchen organization.
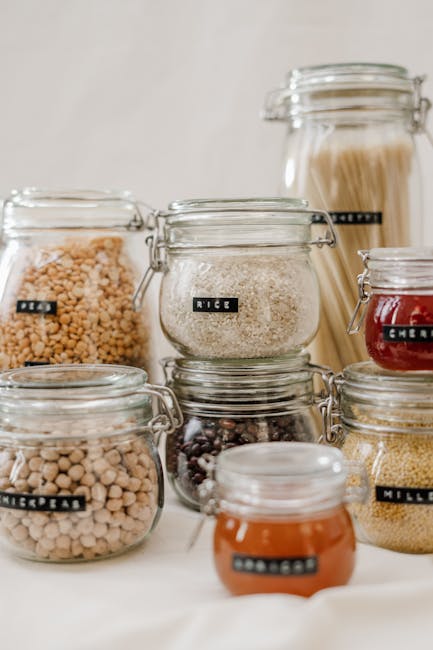
Labeling Containers
Labeling containers is a game-changer for kitchen organization. It takes the guesswork out of finding ingredients, saving you time and reducing stress. Use clear, easy-to-read labels on jars, canisters, and storage bins. Consider using a label maker for a professional look or chalkboard labels for a more flexible option. You can change them as needed without leaving sticky residue. Once, I labeled my pantry items and was amazed at how much quicker I could prepare meals. Have you ever realized how much time you spend searching for sugar or flour?
Grouping Similar Items
Grouping similar items together can transform your kitchen into an efficient workspace. Think of your kitchen in zones: baking supplies, spices, snacks, and canned goods. This makes it easy to find what you need and keeps your kitchen tidy. Imagine opening a cabinet and instantly spotting the exact spice you need, rather than rummaging through a chaotic jumble. You can use baskets or bins to keep these groups together, ensuring everything has its place. What categories could you create to simplify your cooking routine? By labeling and categorizing, you're not just organizing your kitchen—you're enhancing your cooking experience. Remember, the goal is not perfection, but functionality and convenience. What small change will you make in your kitchen today to start this transformation?

Credit: natashaskitchen.com
Maintaining Order
Maintaining order in your kitchen is crucial. It ensures a smooth cooking experience. A well-organized kitchen saves time and reduces stress. It helps you find what you need quickly. This section will guide you on keeping your kitchen tidy.
Regular Cleaning Schedule
Set a weekly cleaning routine. Clean surfaces and appliances regularly. This prevents dirt buildup and keeps your kitchen fresh. Wipe counters daily to avoid mess. Clean your sink and stovetop after use. A clean kitchen is a happy kitchen.
Routine Inventory Checks
Check your pantry and fridge weekly. Make a list of items running low. This prevents overbuying and reduces waste. Keep track of expiration dates. Arrange items by category for easy access. An organized inventory saves time and money.
Video Setup Tips
Creating a kitchen organization video demands a thoughtful setup. The right video setup transforms your content. It ensures clear visuals and sound. To achieve this, focus on two key areas: lighting and camera positioning. Proper attention to these elements enhances viewer engagement. Let's delve into some practical tips for each aspect.
Lighting Considerations
Good lighting is crucial for video clarity. Natural light works best during the day. Position your setup near a window. Use a sheer curtain to diffuse harsh sunlight. For evening shoots, opt for soft, white lights. Avoid overhead lighting that casts shadows. Ring lights can offer even illumination.
Camera Positioning
Positioning your camera correctly is vital. Keep the camera at eye level for direct engagement. Ensure the entire kitchen fits within the frame. Use a tripod for stability and avoid shaky footage. Experiment with angles to find the most flattering view. A wide shot can show the entire workspace.
Filming The Process
Creating an organized kitchen video involves planning and clear visuals. Arrange ingredients and tools visibly for easy access. Keep your filming area tidy to ensure focus remains on the cooking process.
Filming the process of organizing your kitchen can be an exciting and rewarding endeavor. It not only allows you to capture the transformation but also provides a helpful guide for others who might be tackling similar projects. By sharing your journey, you can inspire creativity and motivate viewers to achieve a more organized and functional kitchen themselves.
Step-by-step Recording
Start by planning your shots. Identify key areas that need organizing and decide on the sequence of actions you’ll be filming. Consider capturing a wide shot of the entire kitchen to set the scene and then zoom in on specific areas as you progress. Use natural light to your advantage. Filming during the day can enhance the clarity of your video. Position the camera in a way that minimizes shadows, making sure each step is clearly visible. Don’t forget the details. Show how you sort items, remove clutter, and rearrange shelves. Highlight unique solutions you implement, like using drawer dividers or labeling jars. Your viewers will appreciate these practical tips.
Engaging Narration Techniques
Your voiceover can make or break the viewer’s experience. Speak clearly and maintain an enthusiastic tone to keep your audience engaged. Share personal anecdotes about why you love a tidy kitchen or mention a time when clutter became overwhelming. Ask questions to involve your viewers. "Does anyone else struggle with overflowing cabinets?" This invites interaction and makes your audience feel part of the conversation. Use simple language to explain your actions. Instead of saying, "I utilized this tool," say, "I use this tool." It’s more relatable and easier for everyone to follow. Remember, your goal is to inform and entertain, making your viewers feel empowered to start their own organizing journey.
Editing And Final Touches
Editing and final touches bring your kitchen video together. This step polishes your hard work, making it shine. Good editing enhances the viewer's experience. It tells your story clearly and engagingly. These steps can elevate your video from good to great.
Cutting Unnecessary Footage
Start by reviewing all your recorded clips. Identify scenes that don't add value. Remove these unnecessary bits. They distract from your main message. Keep only the best parts. This ensures a concise and impactful video.
Aim for clarity and engagement. Shorter videos hold attention better. Trim repetitive scenes. Cut out long pauses or awkward moments. Always ask, "Does this serve my audience?" If not, it should go.
Adding Background Music
Choose music that fits your video's mood. It should enhance, not overpower, your content. Music sets the tone and creates emotion. A calm track works well for instructional videos.
Make sure the volume is balanced. The music should not drown out your voice. Test different tracks. See which one complements your message best. Music can make your video more memorable.
Sharing Your Video
Once you've created your kitchen organization video, it's time to share it with the world. This is where the real fun begins! Sharing your video is not just about hitting the 'upload' button; it's about engaging with your audience and maximizing your reach. By choosing the right platforms and promoting your content effectively, you can make sure your video gets the attention it deserves.
Choosing Platforms
The platform you choose can significantly impact your video’s success. Consider where your audience spends most of their time. Are they scrolling through Instagram, or do they prefer watching videos on YouTube? YouTube is a great choice for detailed videos, while Instagram is perfect for quick tips.
Don’t overlook Facebook. It’s a powerful platform for reaching diverse audiences and engaging them through shares and comments. If you're targeting a professional crowd, LinkedIn might be worth considering. Think about where you can best showcase your kitchen organization skills.
Promoting Your Content
Promotion is key to getting your video seen. Start by sharing it on your social media profiles. Encourage your friends and followers to share it, too. Use catchy captions and hashtags to increase visibility.
Consider collaborating with influencers or bloggers who focus on home organization. They can help you reach a wider audience. Email newsletters are another effective way to engage your subscribers. Provide a sneak peek of your video and invite them to watch the full version.
How can you make your content stand out in a sea of videos? Engage with your viewers by asking questions or inviting them to share their own kitchen organization tips. This creates a dialogue and keeps them coming back for more.
Remember, sharing your video is about creating a community around your content. Listen to feedback, respond to comments, and learn from your audience. These interactions can offer valuable insights and make your next video even better.
Frequently Asked Questions
How Can I Start Organizing My Kitchen?
Begin by decluttering your kitchen. Remove unused items and categorize essentials. Group similar items together for easier access. Use clear containers or labels for organization. Keep frequently used items within reach, and store seasonal items higher up. Regular maintenance is key to keeping your kitchen organized.
What Are The Best Kitchen Storage Solutions?
Maximize space with vertical storage. Use racks, hooks, and shelves to utilize wall space. Drawer dividers and cabinet organizers can help separate items. Consider pull-out shelves for easy access. Use clear bins for visibility and stackable containers to save space.
Label everything to maintain organization.
How Do I Maintain A Tidy Kitchen?
Daily tidying prevents clutter. Clean as you cook to minimize mess. Regularly check and discard expired items. Designate specific spots for everyday items. Encourage family to follow the system. Schedule a monthly deep clean to maintain organization. Consistency is key in keeping your kitchen tidy.
What Kitchen Items Should I Declutter First?
Start with expired food, broken utensils, and duplicate items. Assess gadgets that are rarely used. Donate or sell items in good condition. Focus on clearing countertop space for functionality. Regular decluttering makes organizing easier. Keep only items that are truly useful and necessary.
Conclusion
Organizing your kitchen can be simple and fun. With clear steps, you can create a tidy and efficient space. Start with decluttering. Keep only what you need. Use shelves and containers wisely. Label items for easy access. Arrange utensils near the cooking area.
Store food items together. Prioritize frequently used items. Remember, a well-organized kitchen saves time and effort. Enjoy cooking in your neat space. Make small changes often for lasting results. A tidy kitchen helps you stay focused and relaxed. Now, it's time to enjoy your newly organized kitchen!